What's up, Raiders? If you've been roaming the wasteland, you've probably seen the massive Queen guarding that sweet, sweet Harvester. Inside that husk is a high-stakes puzzle that drops some of the best loot in the game, including legendary weapon blueprints. This guide will break down everything you need to know to crack open the Harvester and walk away with some serious hardware. No filler, just the straight-up strats.
Step 1: Getting Past the Queen (Without Wasting Your Ammo)
First things first, you can only tackle this event when the Harvester is active on your map, so check it before you load in. When you get there, you'll see the Queen. She's a beast, hits like a truck, and honestly, fighting her is a waste of time unless you're geared to the teeth and need her core for a level three refinery.

The Queen ARC - a formidable guardian you'll need to bypass to reach the Harvester
Instead of going toe-to-toe, here are a few much smarter ways to get past her:
- Prophetic Cloak: This gadget is your best friend. It makes you invisible to ARC machines, allowing you to sneak right by the Queen.
- Ziplines: Speed is key. You can use a zipline to quickly move past her and get straight to the Harvester husk.
- Smoke Grenades: Don't underestimate the power of a well-placed smoke grenade. They block the line of sight for all ARC machines, including the Queen, giving you the cover you need to get to the entrance.
The Queen has patrol patterns. Watch her movement for 30 seconds before making your move. She'll turn away from certain entrances, giving you a perfect window to slip by undetected.
Step 2: Cracking Open the Harvester Husk
Once you've bypassed the Queen, you need to get inside the Harvester. Look for the three main entry points on the ground level, which are the vents. Prying one open starts a 45-second timer. When that timer hits zero, the inside of the husk gets flooded with fire, so you'll need to be quick.
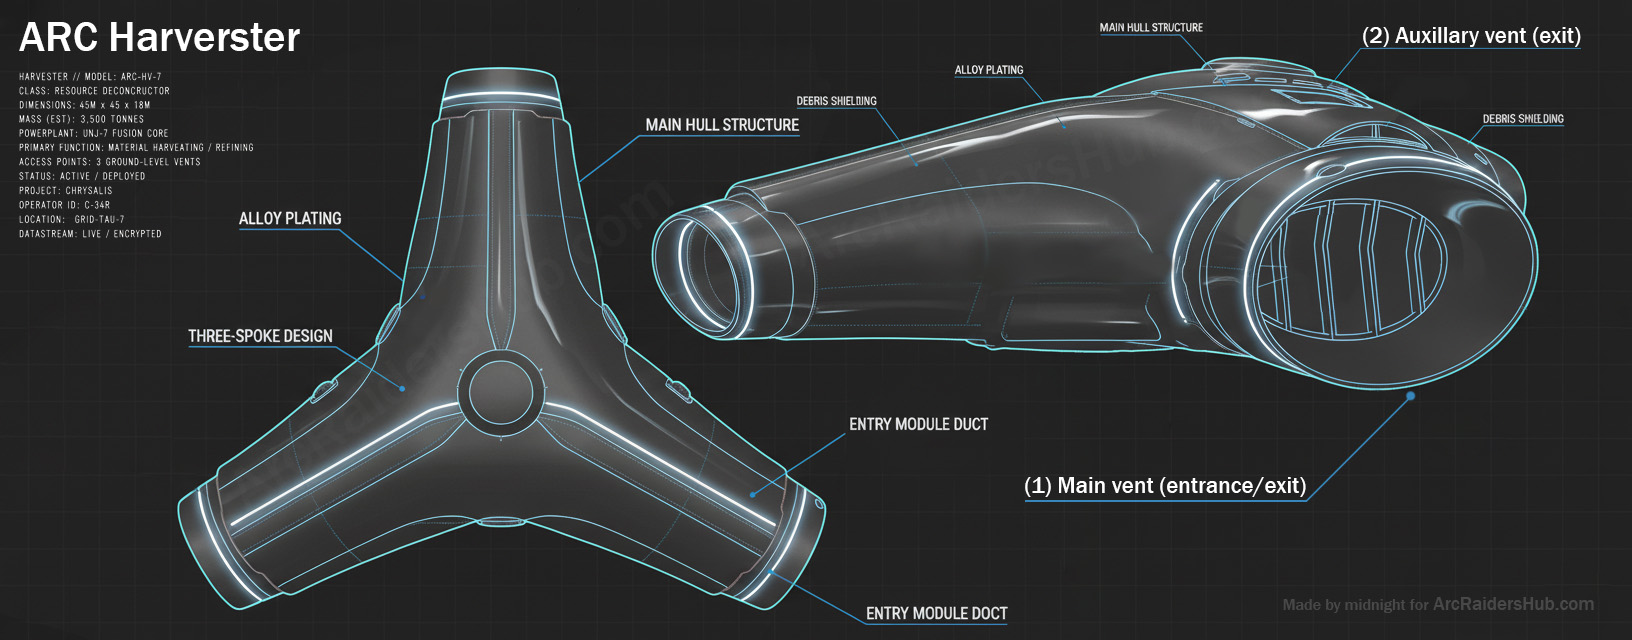
Harvester schematic showing the main hull structure and entry points
There are six exit points: the three main vents (1) you used to enter and three auxiliary vents at the top (2). An audio cue for the fire sounds like 3 alarm sounds right before the flames erupt.
When you hear the alarm, you have about 3 seconds before the fire starts. Don't try to finish what you're doing—get to an exit immediately!
Step 3: The Container Puzzle
Inside there are two levels. The upper deck is where you'll find breach points (3) that you need to search for the puzzle canisters. The lower deck is where you'll insert these canisters (4).
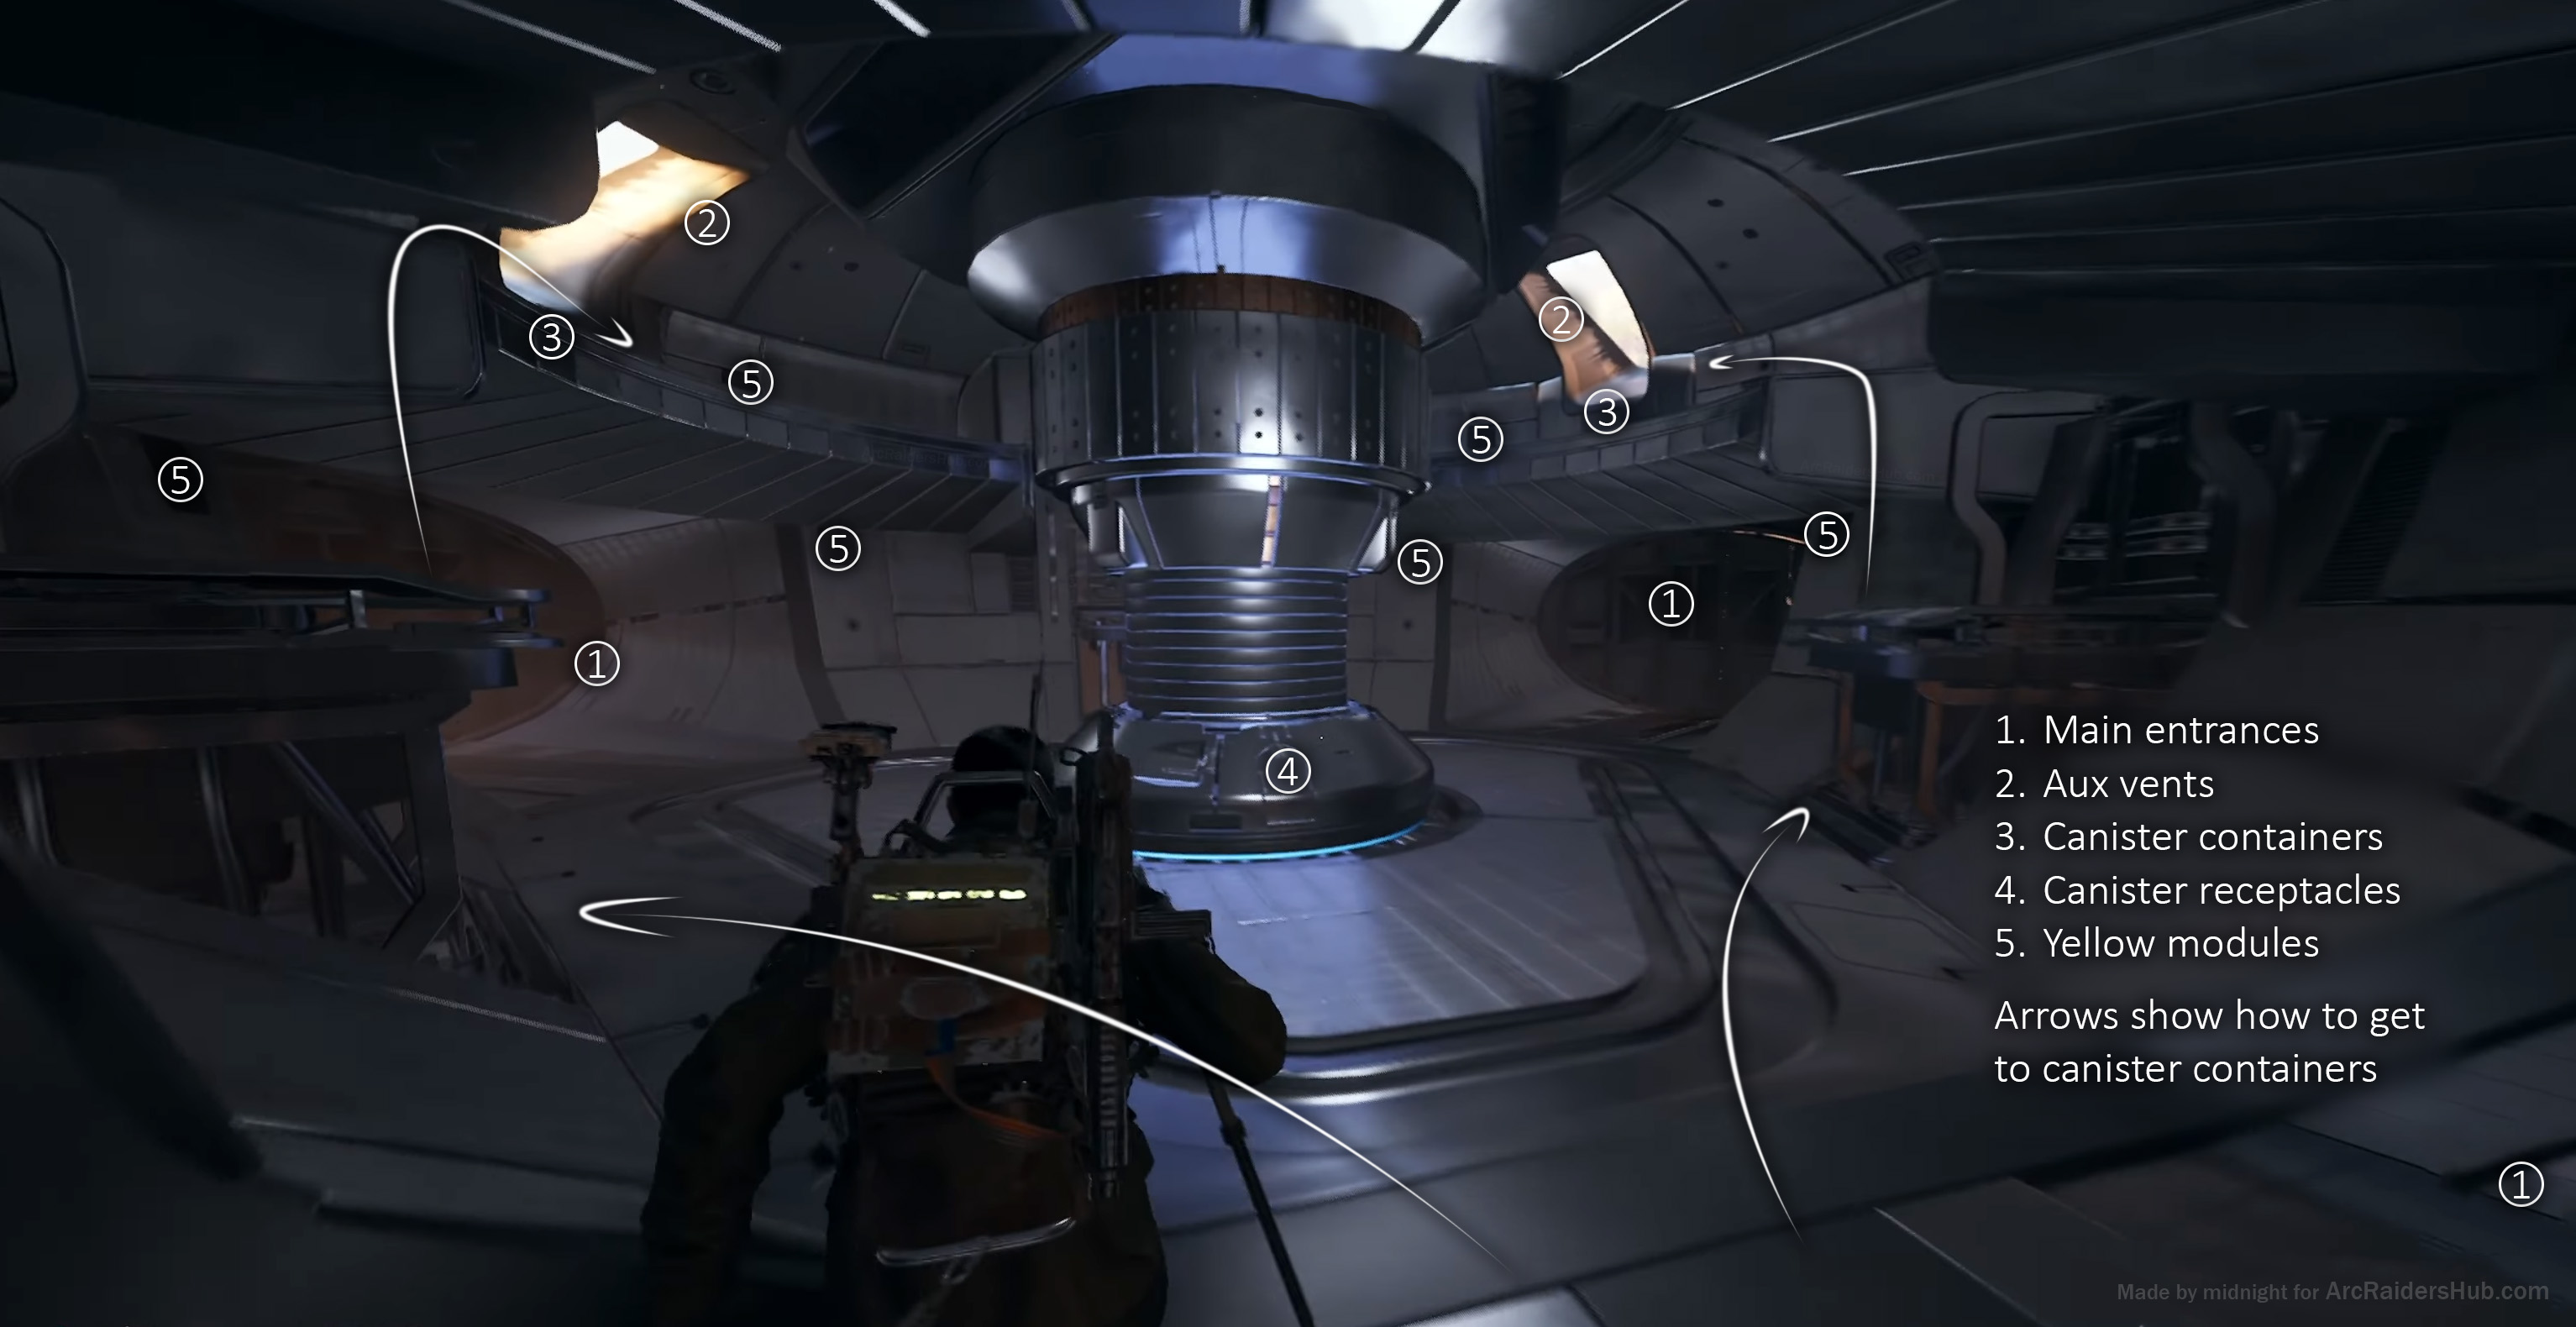
Interior layout of the Harvester showing the central core and various interaction points
Here's the loop for the first phase of the puzzle:
- Head to the upper deck and breach containers (marked as 3 on the image) until you find the puzzle canisters.
- Drop the canisters down to the lower deck.
- On the lower deck, you'll find three hatches (marked as 4 on the image) around the central core. Breach one of these hatches to open a receptacle.
- Insert one of the canisters into the receptacle.
- Repeat this process for all the canisters.
During this phase, the Harvester will sometimes trigger a "core overload shock" that will stun you and drain your shields. It won't kill you, so just wait it out. A pro tip is to unequip your shield before the shock to avoid having it drained. After two shock cycles - the next one will be the fire cycle, so count and be ready to run to an exit when it comes.
When you see the core starting to charge up (visual and audio cues), quickly unequip your shield from your inventory. The shock will still stun you, but your shield won't lose charge. Re-equip it immediately after.
Step 4: The Yellow modules and Final Loot
After all the containers are locked in, the Harvester will enter its final phase, revealing yellow modules around the structure. You need to destroy these either by shooting them or hitting them with your hammer. Meleeing them is often a good strategy to avoid reloading issues caused by the core overload and making you waste time later.
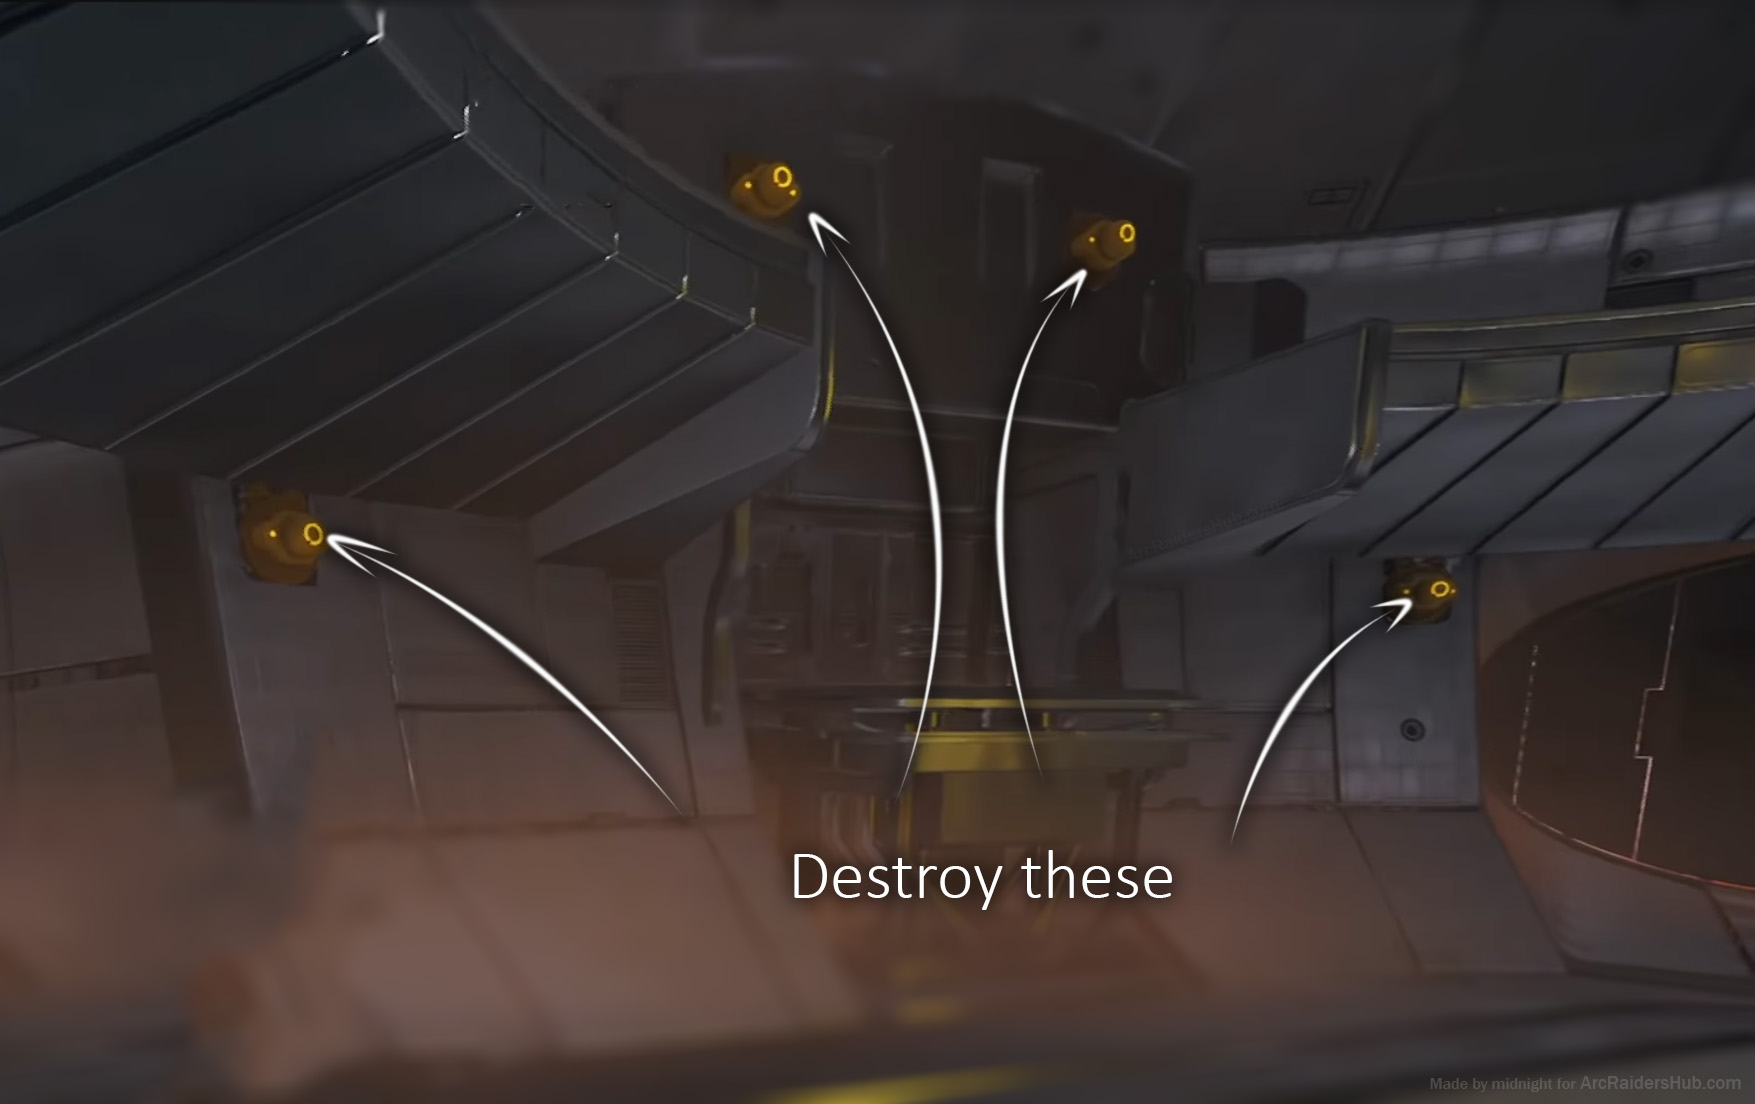
Yellow modules that need to be destroyed in the final phase of the Harvester puzzle
Once all the yellow modules are destroyed, three loot containers will drop from the center piller - that's your reward.
These containers hold some of the most sought-after loot in the game, including legendary weapon blueprints like the Jupiter sniper rifle and the Equalizer beam rifle. Be aware that other players may be waiting to ambush you as you finish the event, so be prepared for a fight on your way to extraction.
The sound of the Harvester completing carries across the map. Expect other Raiders to converge on your location. Have an escape route planned before you grab that loot!
Pro Tips for a Smooth Run
- Bring a Squad: While it's technically possible to do this solo, it's incredibly challenging. Having teammates to watch your back and help with the puzzle makes everything smoother. However, if you manage to pull off a solo run - you will be able to get the content of all three loot containers that is usually split between team members.
- Utility is Key: Smokes, cloaks, and healing items can be the difference between success and failure. Don't skimp on utility items.
- Know Your Exits: This can't be stressed enough. Knowing how to get out quickly when the fire starts is crucial. Practice the routes in your head.
- Loot Everything: Besides the final prize, the breach points on the upper deck often contain valuable resources like circuitry and energy ammo. If you have the space, take everything you can find.
If you're running with a squad, have one player stay outside to watch for other Raiders while the rest work on the puzzle. They can provide early warning and even create distractions if needed.
What You Can Expect to Find
The Harvester event is one of the most rewarding activities in ARC Raiders. Here's what you might walk away with:
- Legendary Weapon Blueprints: Jupiter sniper rifle, Equalizer beam rifle, and other top-tier weapons
- Rare Crafting Materials: Arc performance steel, Arc circuitry, advanced polymers, and energy cores
- Unique Modifications: High-end weapon mods
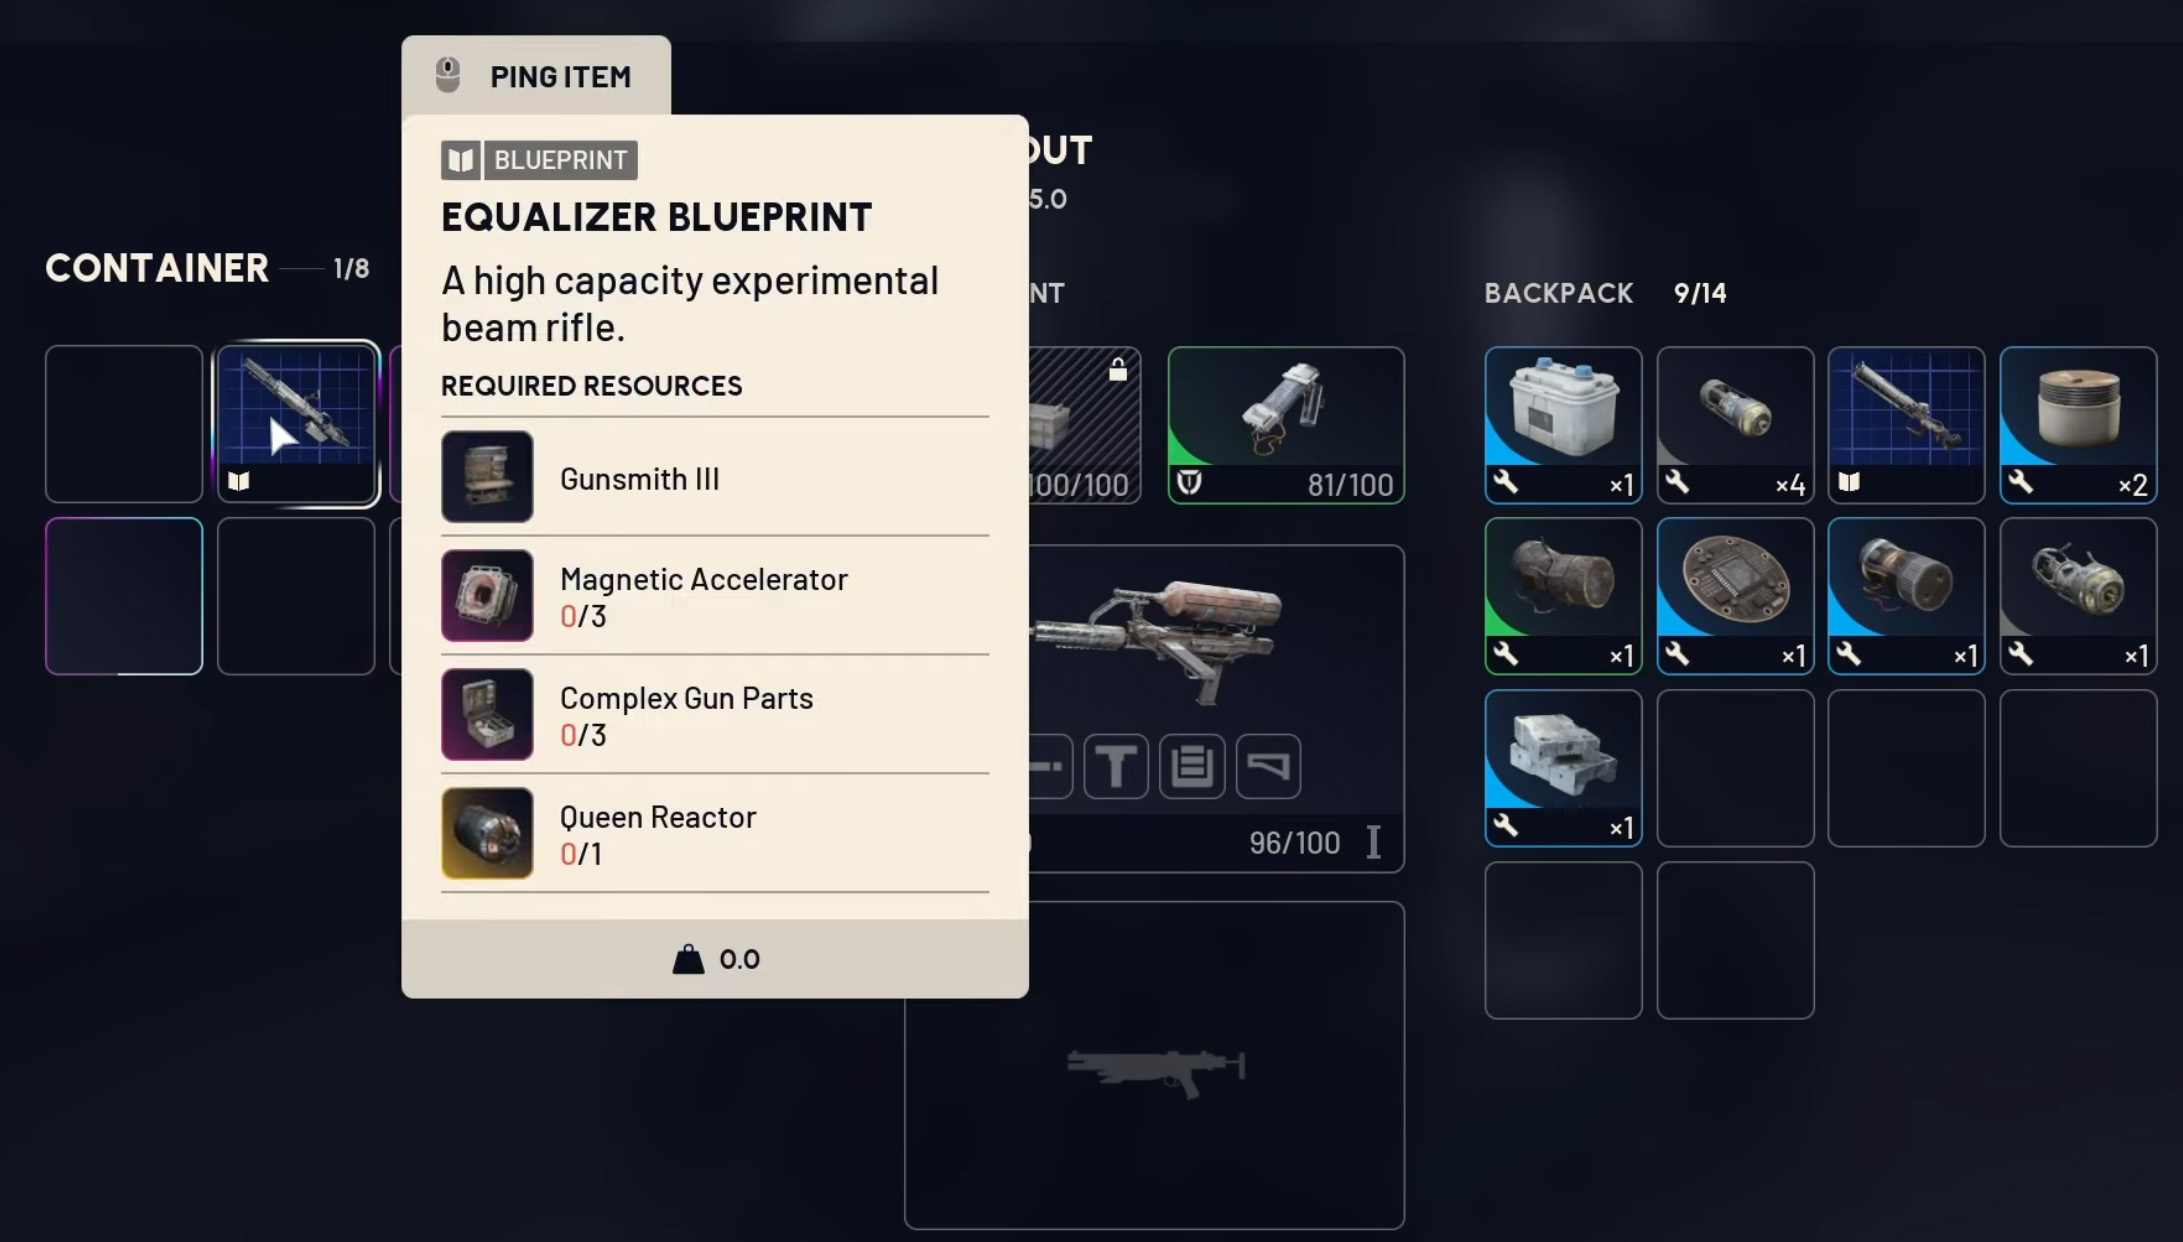
Example of the legendary loot you can obtain from completing the Harvester event, including the Equalizer Blueprint
Remember, the risk matches the reward. This event attracts the most dangerous Raiders on the map, and the Queen isn't going anywhere. But for those brave enough to take on the challenge, the Harvester offers some of the best loot in the entire game.
Good luck out there, Raiders. May your extractions be clean and your loot legendary! 🎯
💬 Need Help or Have Tips?
Join our Discord community to share strategies, ask questions, and connect with other Raiders!
Join Discord Server