

What Is the Phantom Targets Project?
Phantom Targets is the latest Player Project, launched on August 4, 2026. The setup: Shani has noticed strange readings in the surveillance data but can't pin down the source. To triangulate the phantom signals, Raiders need to repair faulty antennas across the Rust Belt — and then take on the ARC with some unconventional strategies to test where the interference is coming from.
The project ships in two parts. Part 1 launched on August 4, and Part 2 went live with Update 1.42 on August 18, together with the Phantom Targets Event and its Merit rewards track. For the full context of what shipped alongside Part 1, see our Store Update 1.40.0 breakdown.
Stage 1: Upgrade Antennas on Cargo Elevators
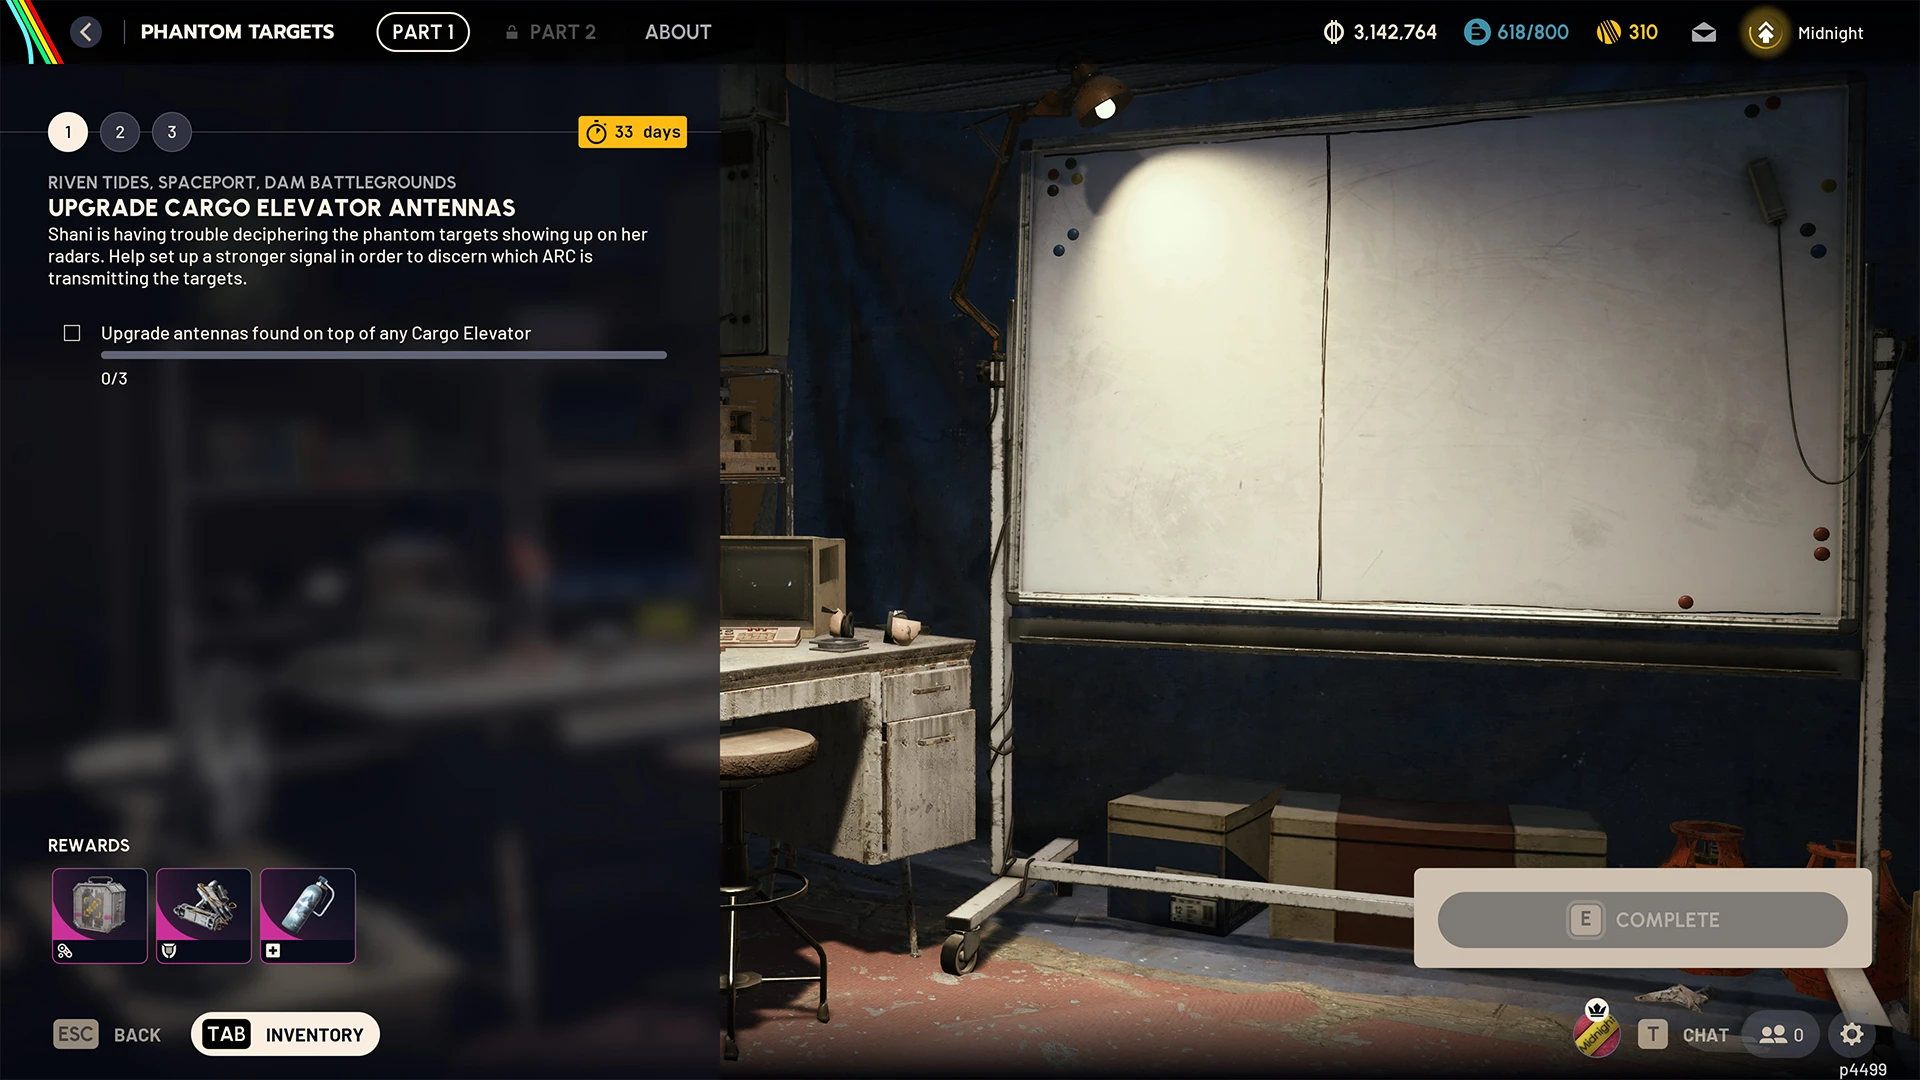
The first stage asks you to upgrade three antennas found on cargo elevators. If you're wondering what a cargo elevator in ARC Raiders actually is — it's the base type of extraction point, the big industrial lift you ride out of the map on. Since there's no fighting involved, I suggest going in with an empty or free loadout — you're just there for the antennas.
On the extraction point itself, there's an antenna mounted on the structure. Climb a little closer to it on the diagonal — up the sloping edges of the extraction point — and hit E to upgrade it.
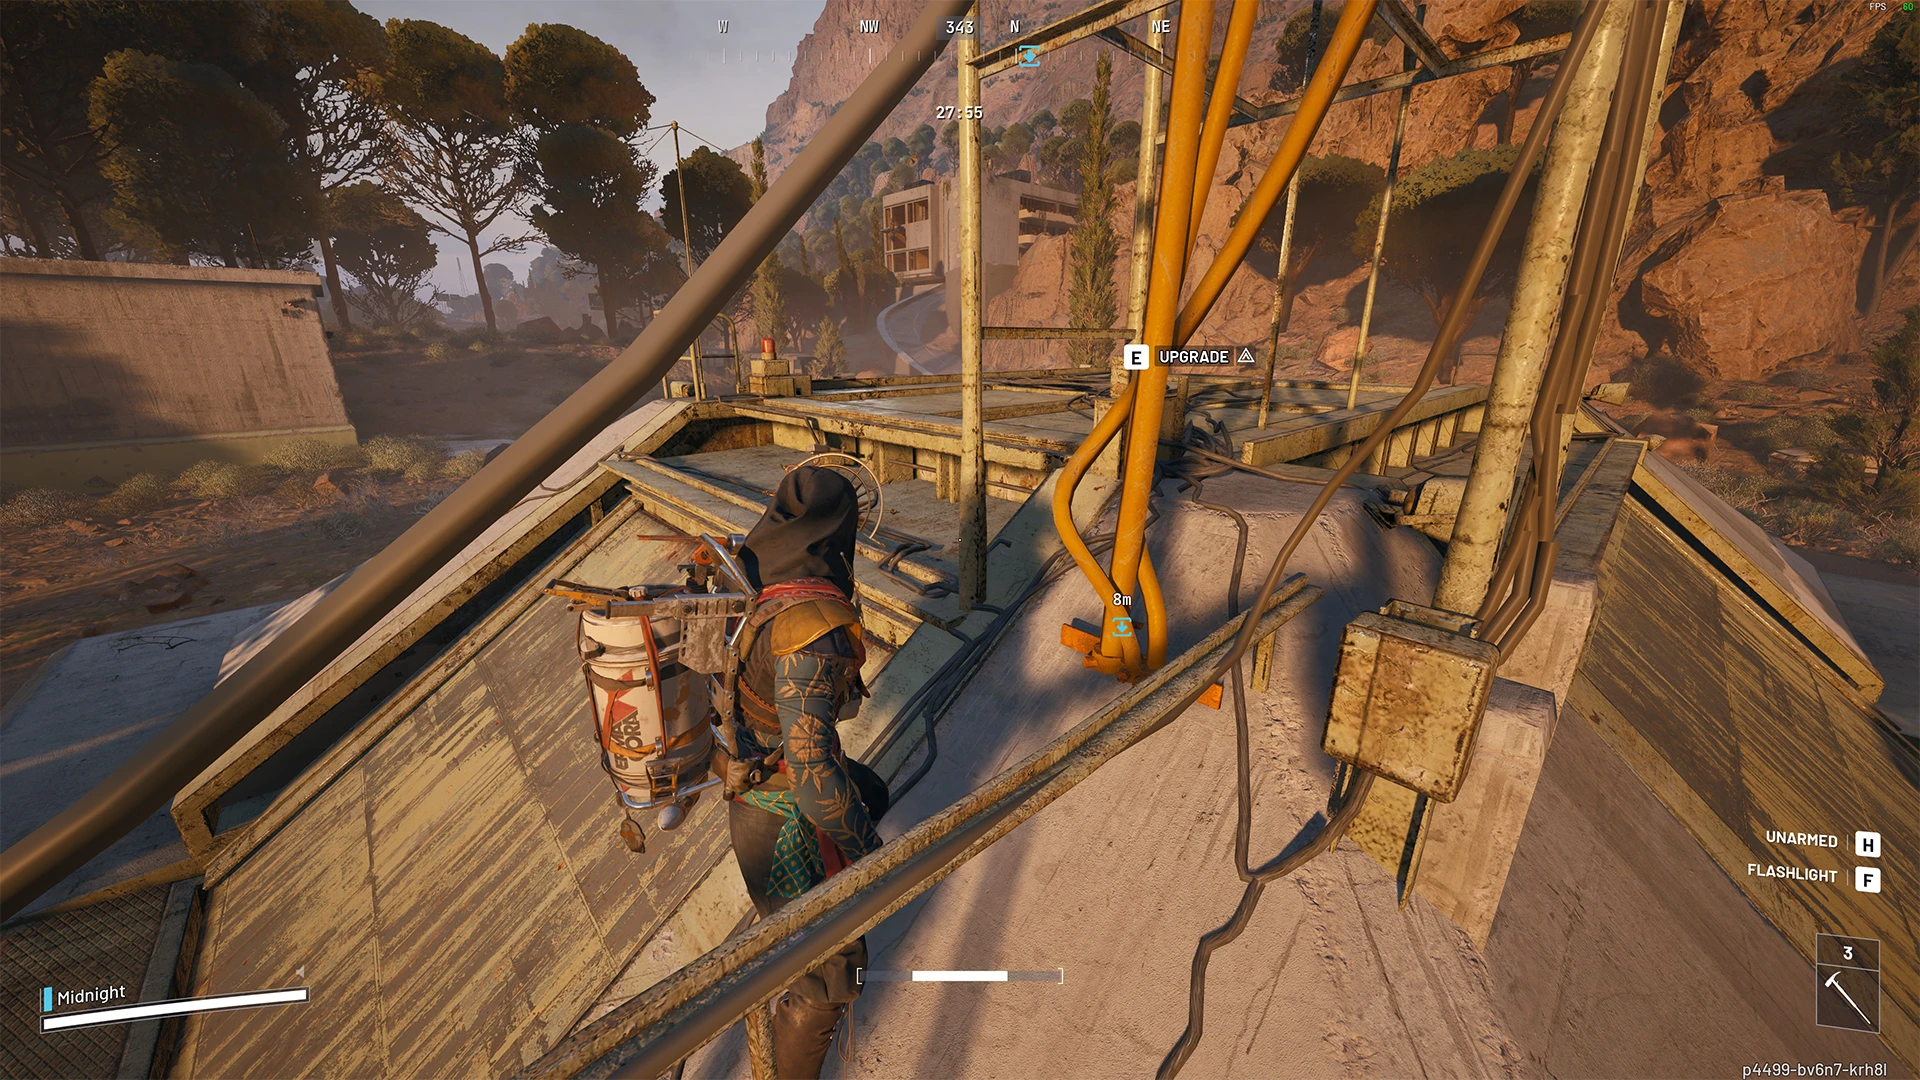
You need three different antennas, so once you've upgraded one, the fastest approach is to surrender (hit Escape → Surrender) and re-queue on a different server. Alternatively, just run to the next extraction point on the same map and upgrade another antenna there.
Surrendering or getting killed does not impede your progress — that goes for the antenna upgrades and for all the damage tasks in Stage 2. Everything banks the moment you do it, so there's no need to extract successfully. Surrender freely.
Cargo elevators are mainly present on the Dam Battlegrounds map, which makes it the natural place to grind this stage. You can knock out several antennas in a single raid if you route between extraction points — the Central Swamp Lift and Water Treatment Elevator are close enough to chain in one run.
🗺️ View all extraction points on our interactive Dam Battlegrounds map →The link above opens our interactive map pre-filtered to show only extraction points, so you can plan a route between cargo elevators before you drop in.
Stage 1 Rewards
- Aggressive augment
- Heavy Shield
- Vita Spray
Stage 2: Test ARC Parts for Irregular Behavior
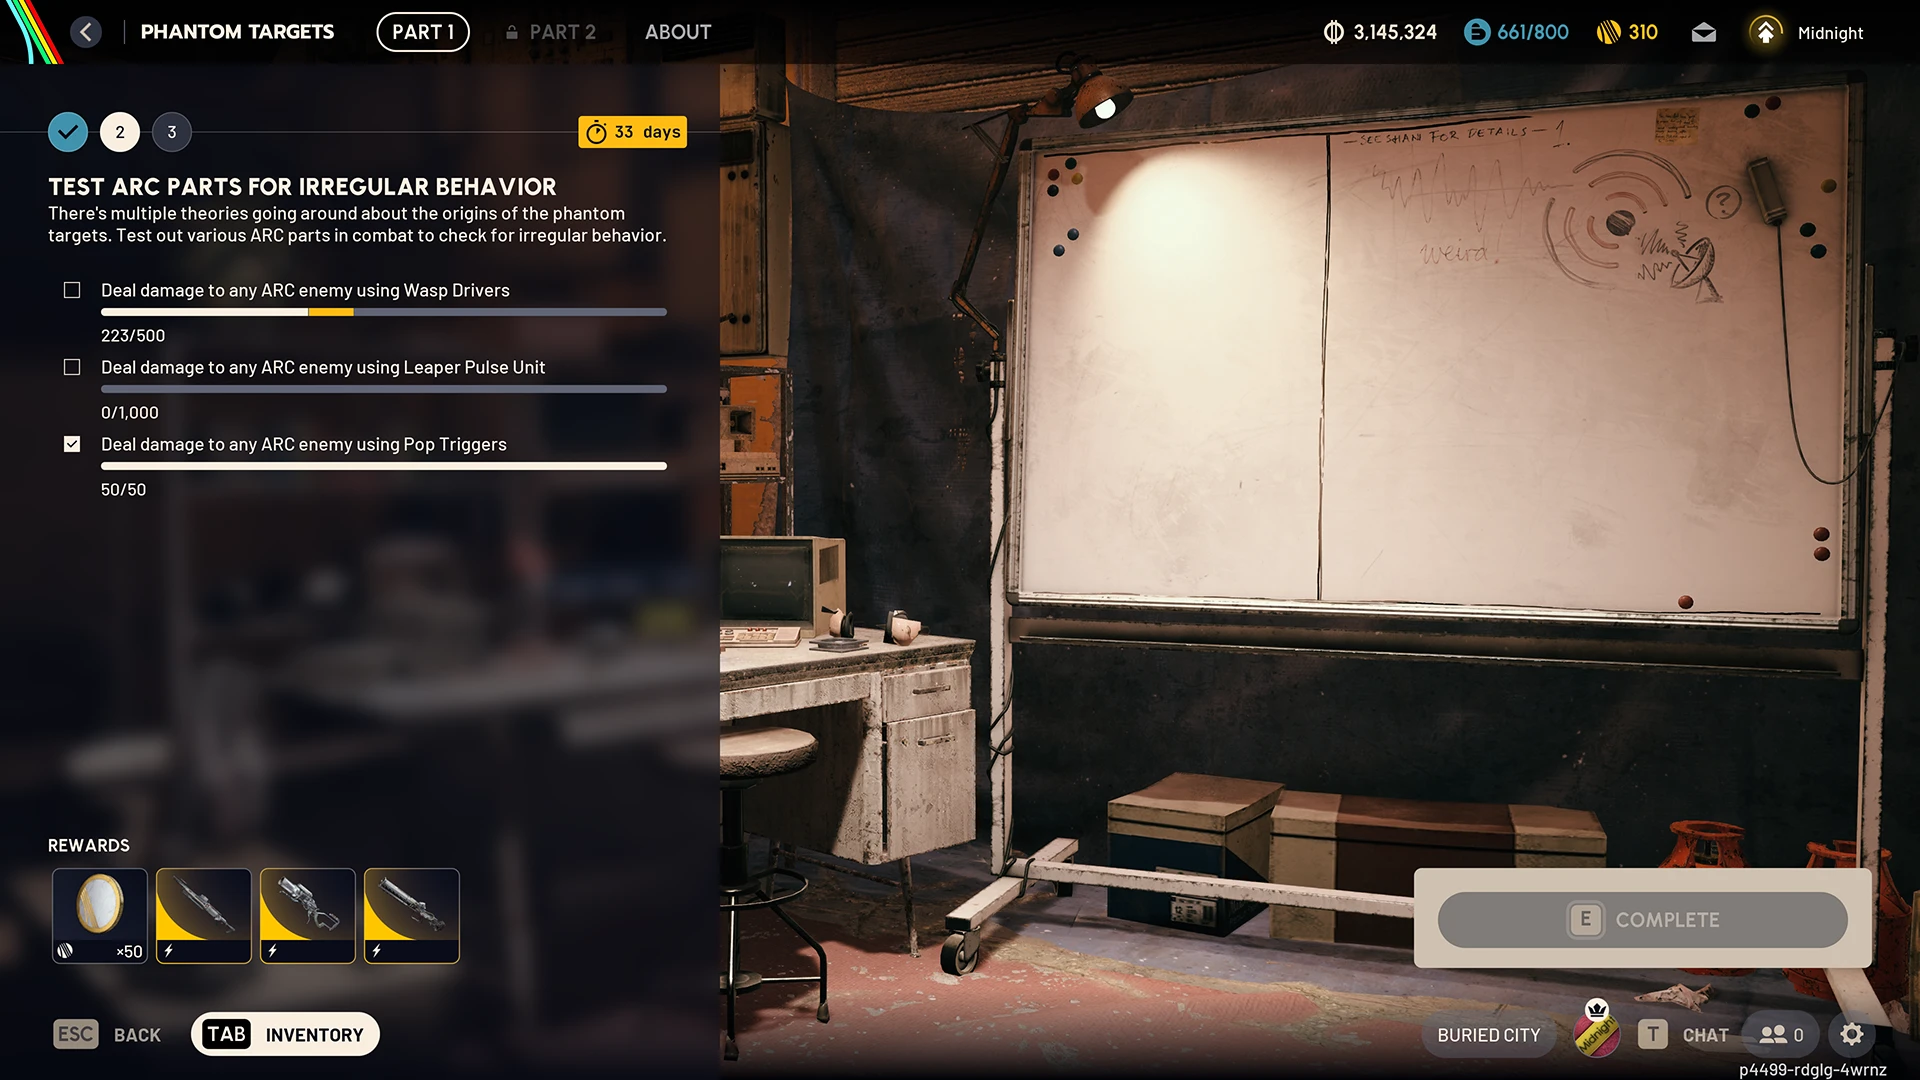
Stage 2 leans into the "unconventional strategies" theme. There are multiple theories going around about the origins of the phantom targets, so Shani wants you to test various ARC parts in combat and check for irregular behavior. That means dealing damage to ARC enemies using three specific throwable ARC parts:
Stage 2 Requirements
- Deal 500 damage to any ARC enemy using Wasp Drivers
- Deal 1,000 damage to any ARC enemy using Leaper Pulse Units
- Deal 50 damage to any ARC enemy using Pop Triggers
How to Actually Use These Items
Pop Triggers, Wasp Drivers, and Leaper Pulse Units aren't used straight from your backpack. Drag them into your quick use slots in the top right of your inventory — the same slots where you keep bandages, shield rechargers, and grenades — then select them on the quick use wheel with the Q hotkey to throw them.
How to Farm Pop Triggers (Best Spot)
For the Pop Trigger requirement, head to the Water Treatment Control area of Dam Battlegrounds. The corridors between it and the main corridor — the one connected to the primary facility that leads into the floodgates — are littered with Pop ARC enemies and Fireballs.
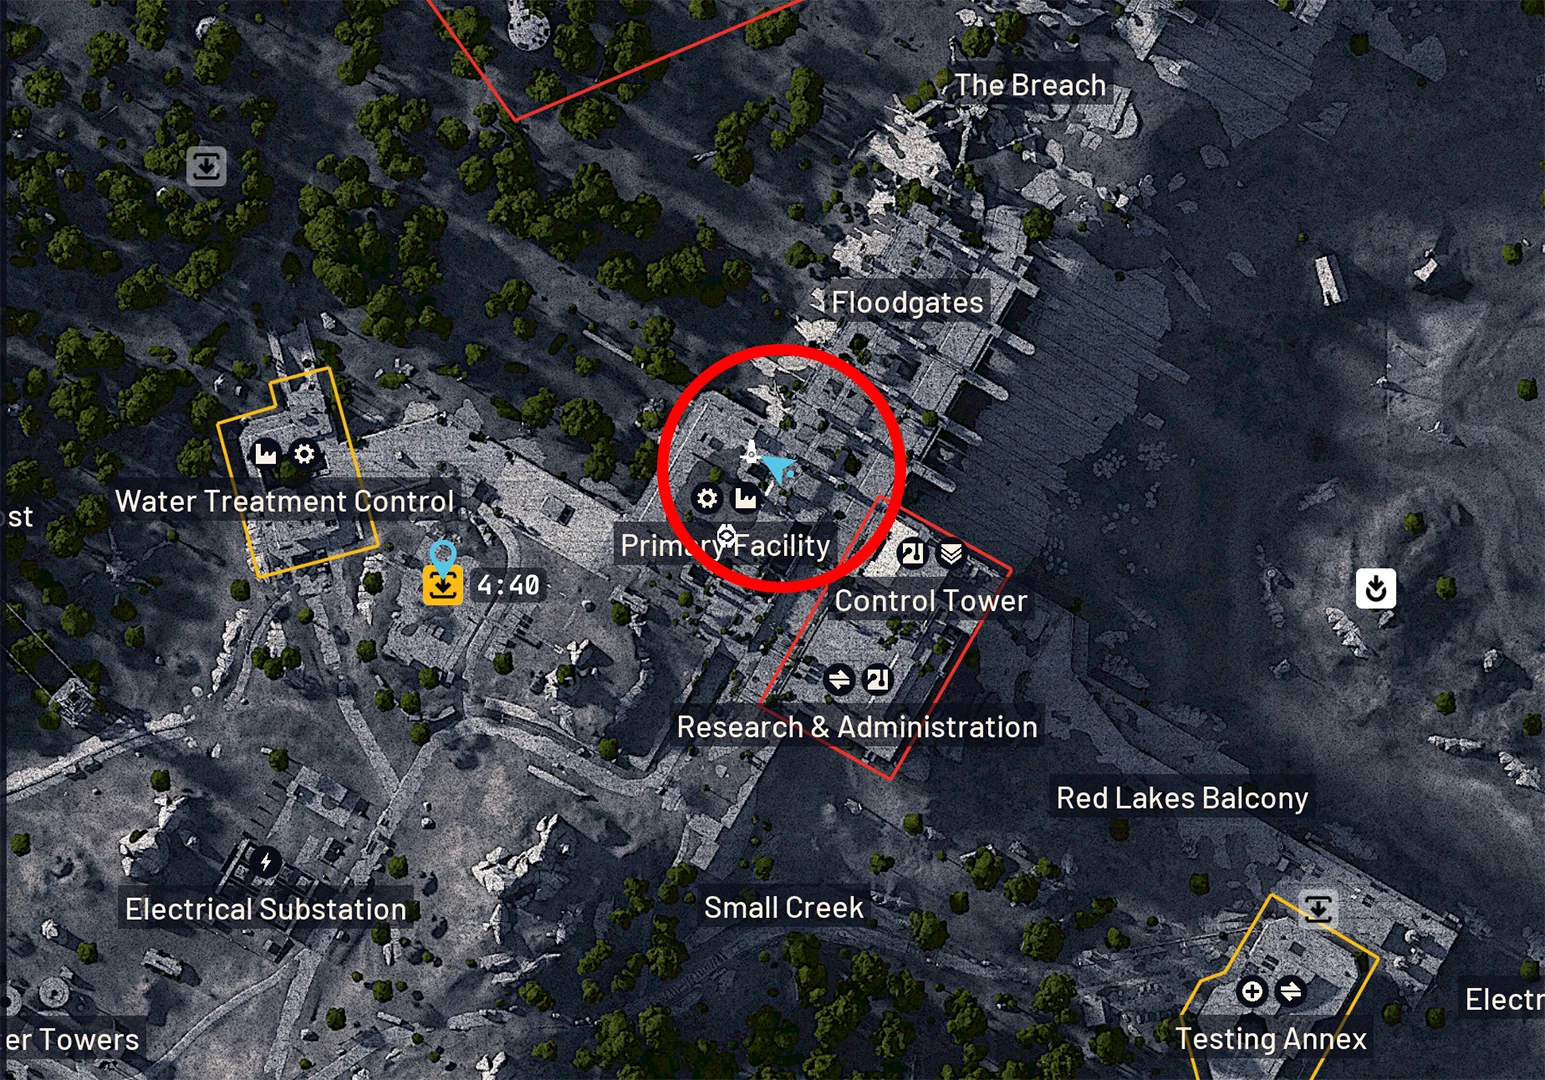
This creates a very convenient loop: kill Pops to harvest Pop Triggers, then throw those Pop Triggers at the other Pops to deal project damage and kill more Pops, which drop more Pop Triggers to keep the cycle going. You'll clear the 50-damage requirement in a single visit.
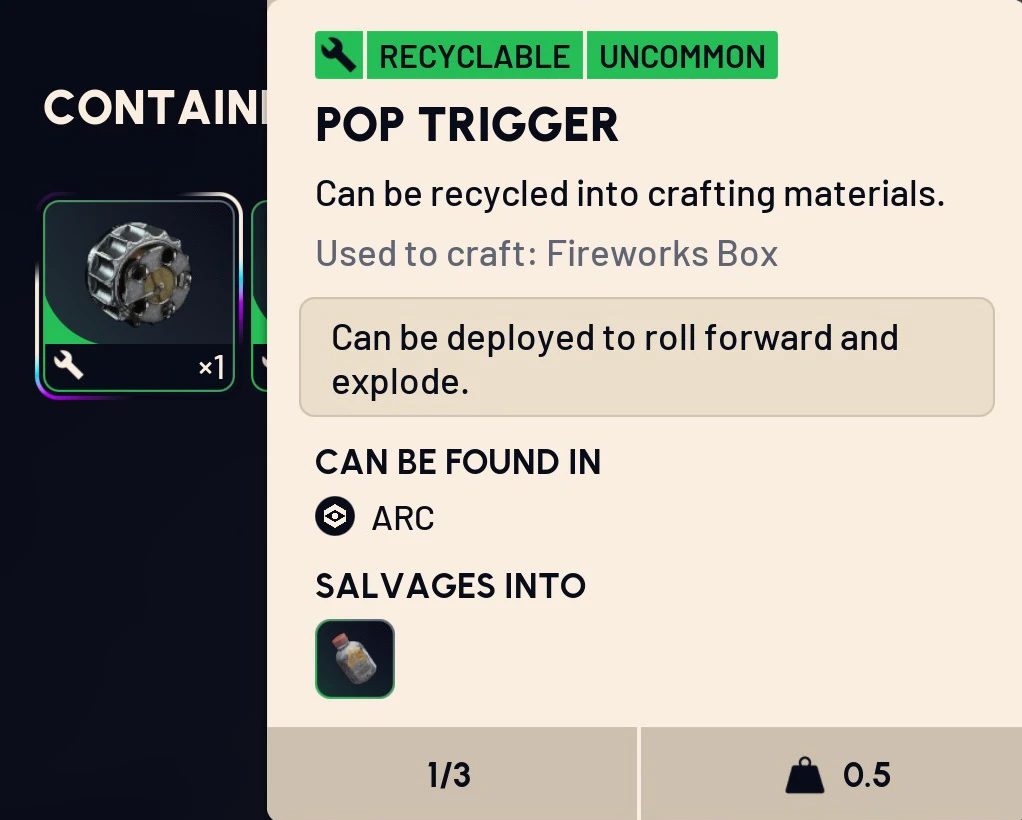
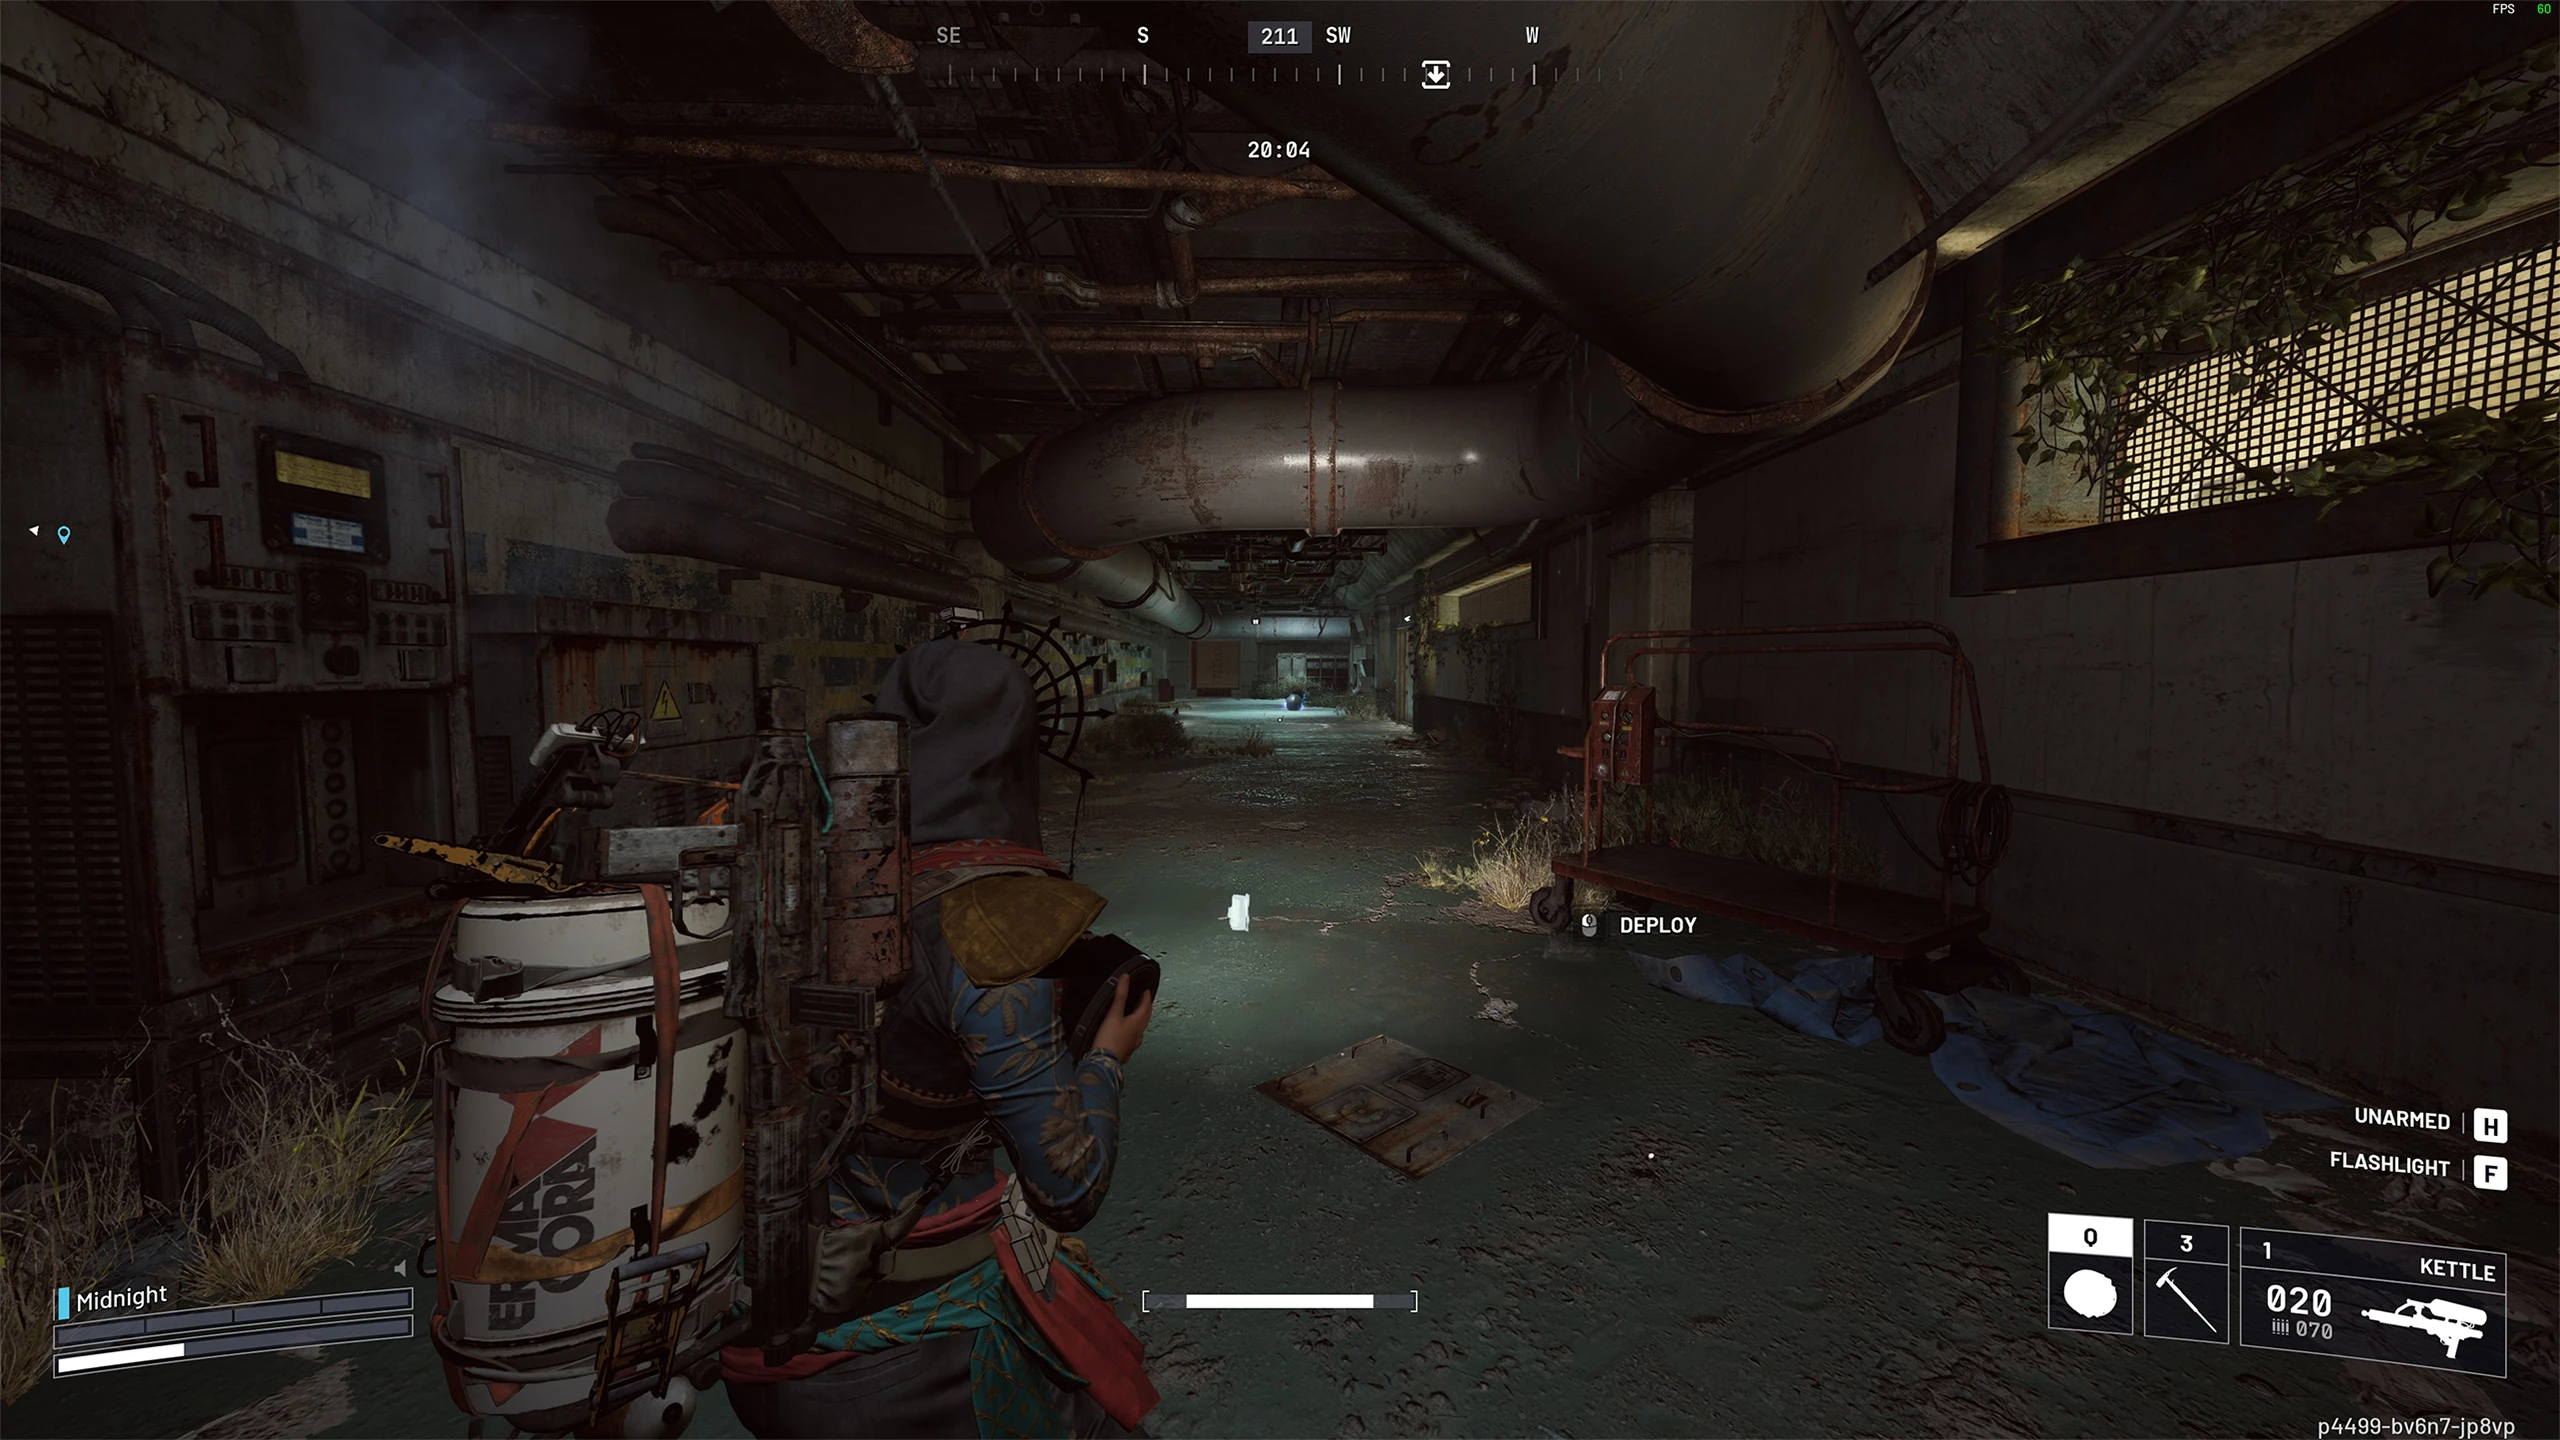
Bonus trick for killing Pops without firing a shot: bait the Pop into charging you, then dive forward over it as it lunges — it detonates behind you, and you can walk back and loot the Pop Trigger from the wreck. No ammo spent.
How to Farm Wasp Drivers (Best Spot)
For the Wasp Driver damage, my recommendation is Buried City. Fire at Snitches to make them spawn Wasps, and of course kill any Wasps you come across anyway — then harvest the Wasp Drivers from their wrecks. When shooting Wasps down, aim for the center body rather than the rotors — clipping a rotor sends the Wasp careening around erratically, while body shots drop it cleanly so the driver lands somewhere easy to collect.
Buried City usually has two spots where the Bastion and Bombardier ARC spawn. Once you've stocked up on Wasp Drivers, throw several of them behind the big ARC and shoot the Wasp Drivers to detonate them.
Why big ARC targets are better: I first tried detonating Wasp Drivers on the Pops around Water Treatment, and accumulating the damage took far longer. The trick is that when you kill a small ARC with a large explosion, you can only ever deal damage equal to that enemy's remaining HP — all the overkill damage is lost. Bastions and Bombardiers are bulky enough to absorb the full blast, so every detonation counts for much more project progress.
How to Kill Leapers & Get Leaper Pulse Units
To harvest Leaper Pulse Units you first need dead Leapers. A reliable takedown combo: drop Jolt Mines and bait the Leaper onto them, then hit it with Blaze Grenades while it's staggered and keep it burning. If you'd rather just shoot it, focus its eyeball weak point with a heavy-hitting gun like the Anvil or Bettina.
Where to Use Leaper Pulse Units
The requirement is a hefty 1,000 damage, and Pulse Units are the most annoying of the three parts to restock — every wasted throw means hunting another Leaper. Two things matter: overkill damage on small ARC is lost (you can only ever deal an enemy's remaining HP), and the Pulse Unit has a long detonation delay, so a target that wanders off before it goes off wastes the whole throw.
That's why the best targets are big, slow ARC in confined spaces. My suggestion is the Bombardiers and Bastions on Buried City — their large HP pools absorb the full blast. Community testing puts a Pulse Unit at roughly 300–420 damage per detonation against big ARC, so expect around three good throws to finish the task.
Alternative — the Shredder room method: a popular approach is the Port Authority building on Riven Tides, where a Shredder patrols. Lure it inside a room on the second floor, immobilize it with a Showstopper, drop your throwables on it, and close the door so it can't wander off during the detonation delay. The same room trick works for Pop Triggers and Wasp Drivers too. One caution: don't dump more than two Pulse Units into one Shredder — it'll be nearly dead by then and the rest of the damage gets wasted as overkill.
Stage 2 Rewards
Completing Stage 2 hands you three legendary energy weapons plus Raider Tokens:
- Jupiter
- Aphelion
- Dolabra
Don't sell these — they're exactly what you need for the energy damage task in Stage 3.
Stage 3: Test Multiple ARC Destruction Methods
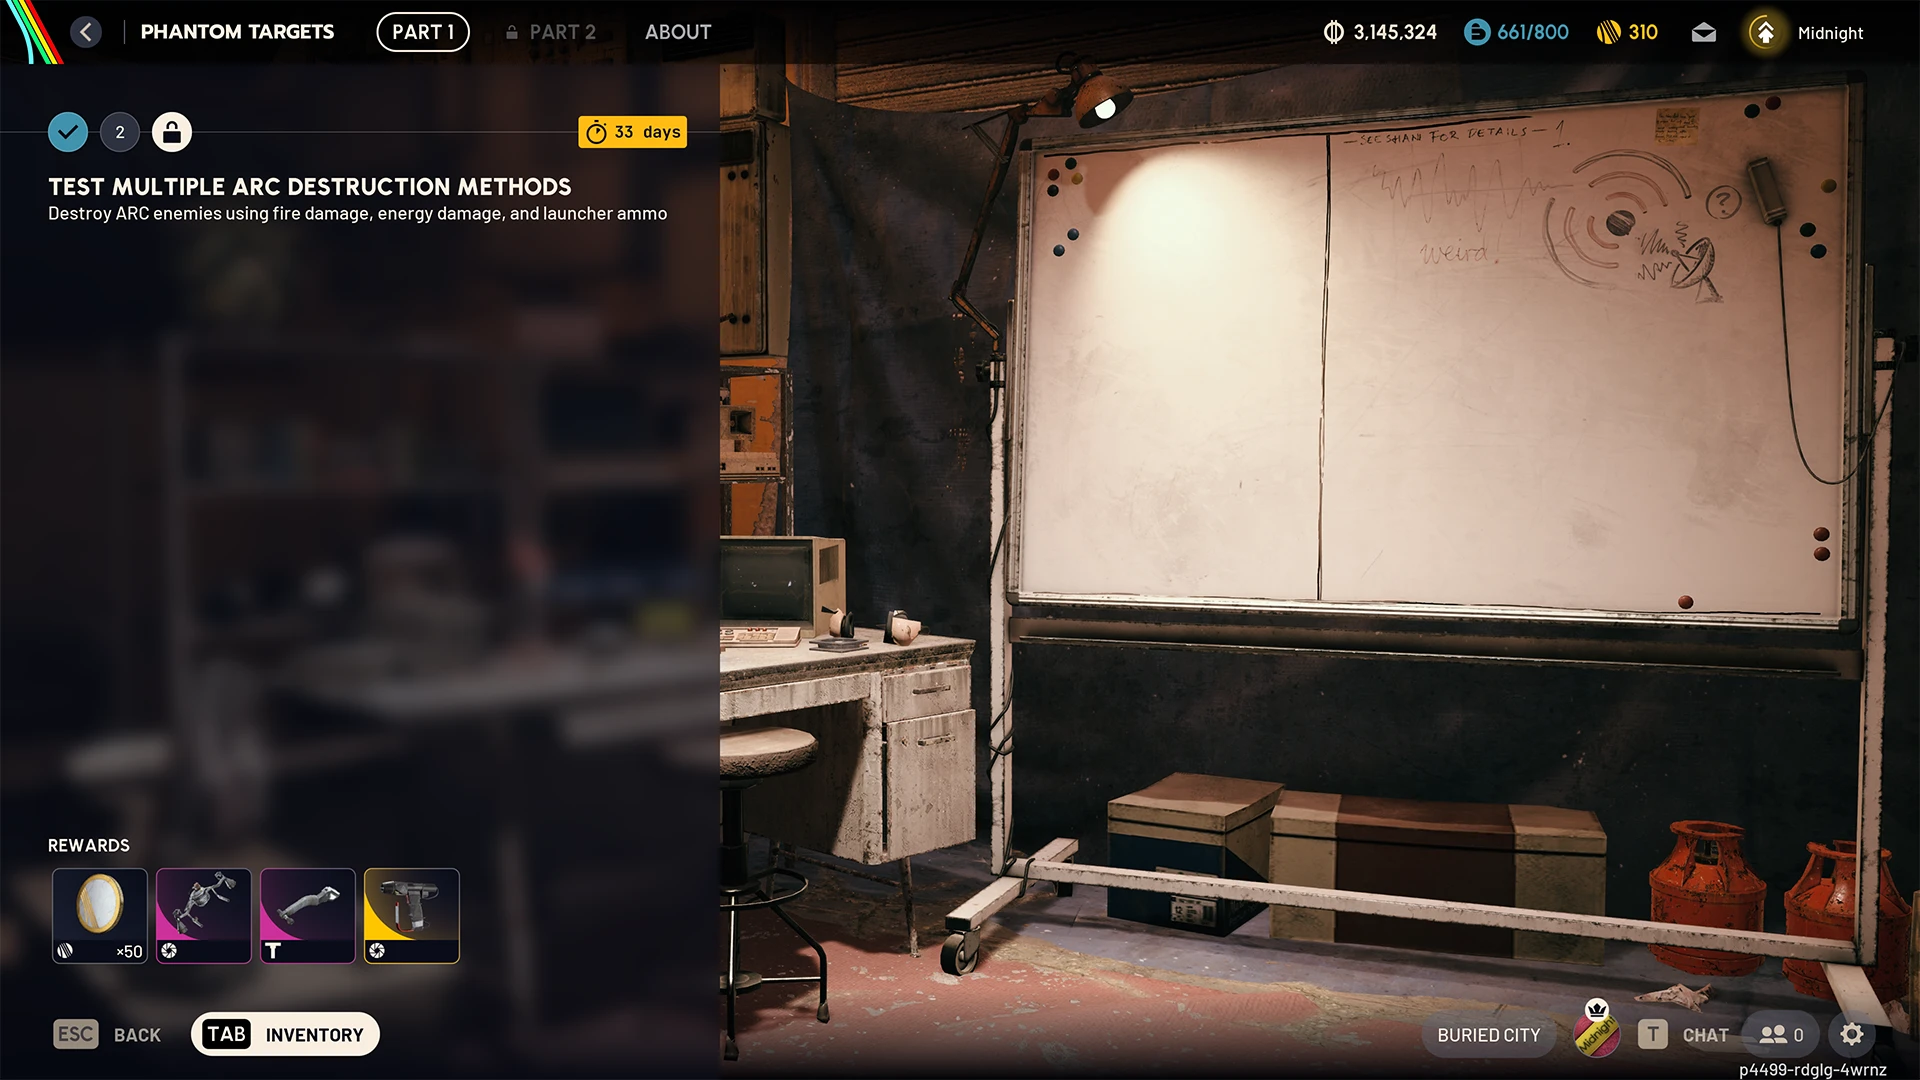
The third stage asks you to destroy ARC enemies using fire damage, energy damage, and launcher ammo. Compared to Stage 2 this is much more flexible — whole categories of weapons and gadgets count, so you can lean on whatever you have stocked.
Stage 3 Requirements
- Deal 1,500 damage to ARC using fire damage — Blaze Grenades, Fireball Burners, Firefly Burners, or the Flame Spray
- Destroy Bastions, Leapers, Vaporizers, or Rocketeers using energy weapons
- Destroy 20 flying ARC using launcher-ammo weapons — the Hullcracker or Rascal
Fire Damage (1,500)
This is the biggest number of the stage, and it's where those Fireball Burners from the Stage 2 corridors finally pay off — they deal the same damage as a Blaze Grenade and are far easier to stock up on. Farm them off the Fireball spawns in the Water Treatment corridors on Dam, or on Riven Tides around the Customs House and the stacking yard. If you have the Blaze Grenade blueprint, crafting works too.
The best target is the Bombardier: it's the one big ARC that stays put when aggroed, so it both eats the direct hit and keeps standing in the burning pool afterwards. Direct impacts are what matter — try to stick the ARC itself, not the ground near it. Around six Burners on a Bombardier accounts for roughly 1,100 damage, so expect eight or so to clear the whole task. Keep your distance, weave in and out of cover between throws, and holster the item to move quicker.
Energy Weapon Destroys
This is exactly what the Stage 2 legendary rewards are for. The Jupiter is the standout choice — high damage at range. The safest play is engaging a Rocketeer from long distance (200–300m) with hard cover next to you to break line of sight when the rockets come in.
Bastions also work if you're careful: two shots to a leg immobilizes one, and shooting the top plating opens up its central core weak point. Avoid using Leapers for this task — they close distance and jump on your head before you get your shots in.
Destroy 20 Flying ARC with Launcher Ammo
Bring a Hullcracker or Rascal and go after the weakest flying ARC — Wasps and Hornets. Rocketeers technically count as flying ARC too, but they soak up far too much launcher ammo to be worth it. Riven Tides is the best map for this, since flying ARC are everywhere; the Seaside Elevator makes a good central base to sweep from. Let the flyers aggro and come close before firing so you don't waste shots on long-range misses.
Reward of Note: Powered Descender
One reward worth calling out is the Powered Descender, introduced with the Riven Tides map. It's a relatively hard item to find in the wild, so completing this stage is one of the more reliable ways to get your hands on one. Finishing all of Part 1 also pays out 100 Raider Tokens on top of the stage rewards.
Part 2: Hunt the Glitched Wasps (Stages 4–6)
Part 2 finally reveals what the phantom signals were: glitched ARC. The investigation now centers on glitched Wasps — and everything in stages 4 and 5 revolves around collecting their parts. Unlike Part 1's damage tasks, these stages work on a commit system: you bring the parts back and commit them to the project from the project screen.
Stage 4: Bring In Glitched Wasp Parts for Testing
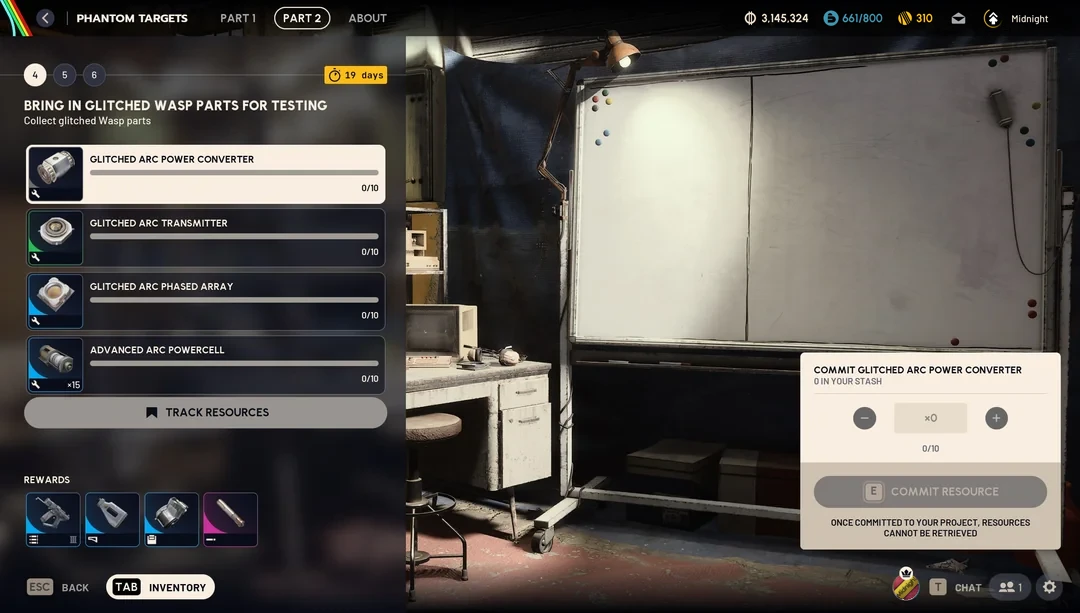
The first Part 2 stage asks you to collect and commit 10 of each of the following:
Stage 4 Requirements (10 each)
- Glitched ARC Power Converter — Common drop
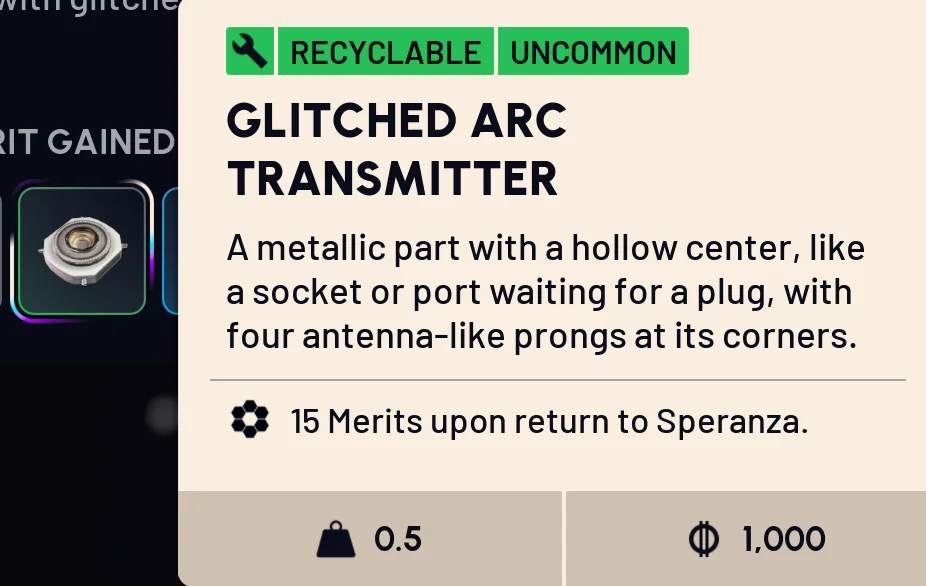
- Glitched ARC Transmitter — Uncommon drop
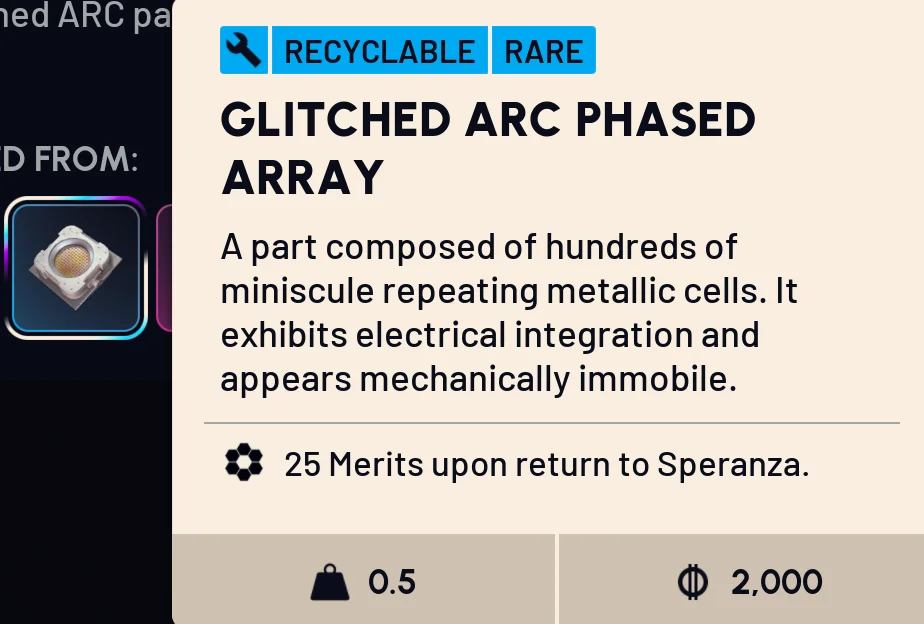
- Glitched ARC Phased Array — Rare drop
- Advanced ARC Powercell — regular loot, check your stash first
The Advanced ARC Powercells are the freebie here — they're ordinary ARC loot you've probably been hoarding already. The three glitched parts come from the new glitched Wasps, so expect to spend this stage hunting and harvesting them.
Stage 5: Perform Final Tests on Glitched Wasp Parts
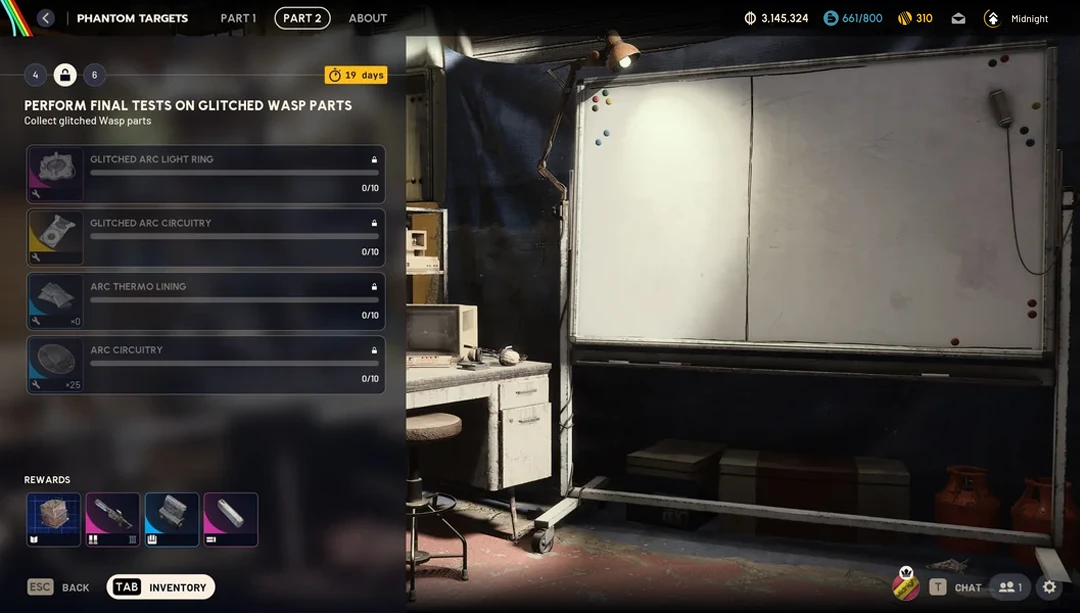
Stage 5 unlocks after Stage 4 and raises the rarity bar — again 10 of each:
Stage 5 Requirements (10 each)
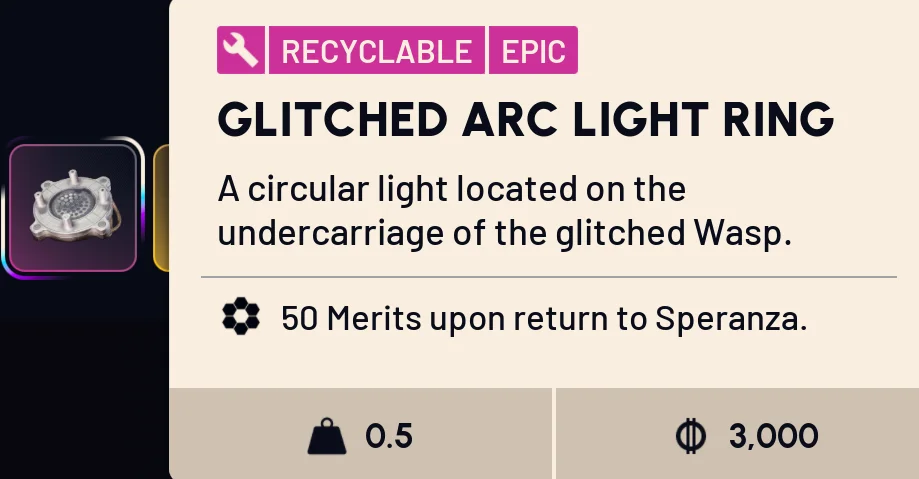
- Glitched ARC Light Ring — Epic drop, found on the undercarriage of the glitched Wasp
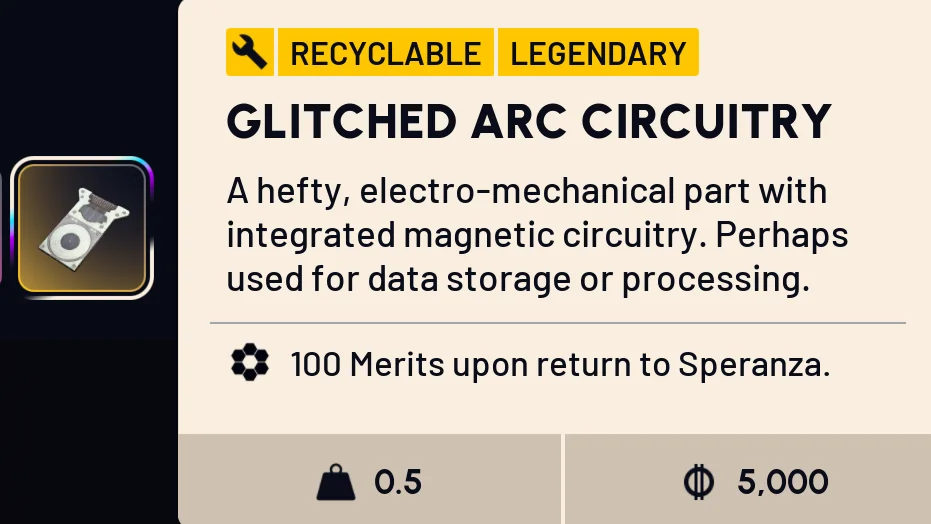
- Glitched ARC Circuitry — Legendary drop, the rarest part in the set
- ARC Thermo Lining — regular ARC loot
- ARC Circuitry — regular ARC loot
Ten Legendary Glitched ARC Circuitry is the real grind of Part 2 — this is where most of your glitched Wasp hunting hours will go.
Stage 6: Conduct One Final Explosive Test
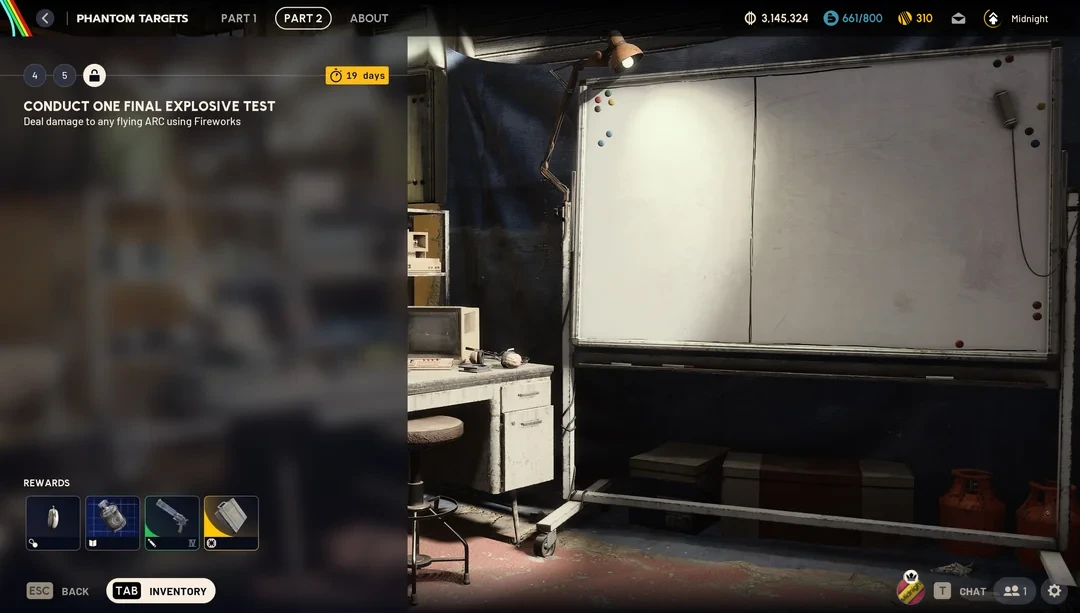
The finale is a single task in classic Phantom Targets style: deal damage to any flying ARC using Fireworks. It's locked until you clear Stage 5. Wasps and Hornets are the obvious targets — the same "let them aggro in close before you commit the throwable" advice from Stage 3 applies.
Part 2 Stage Rewards
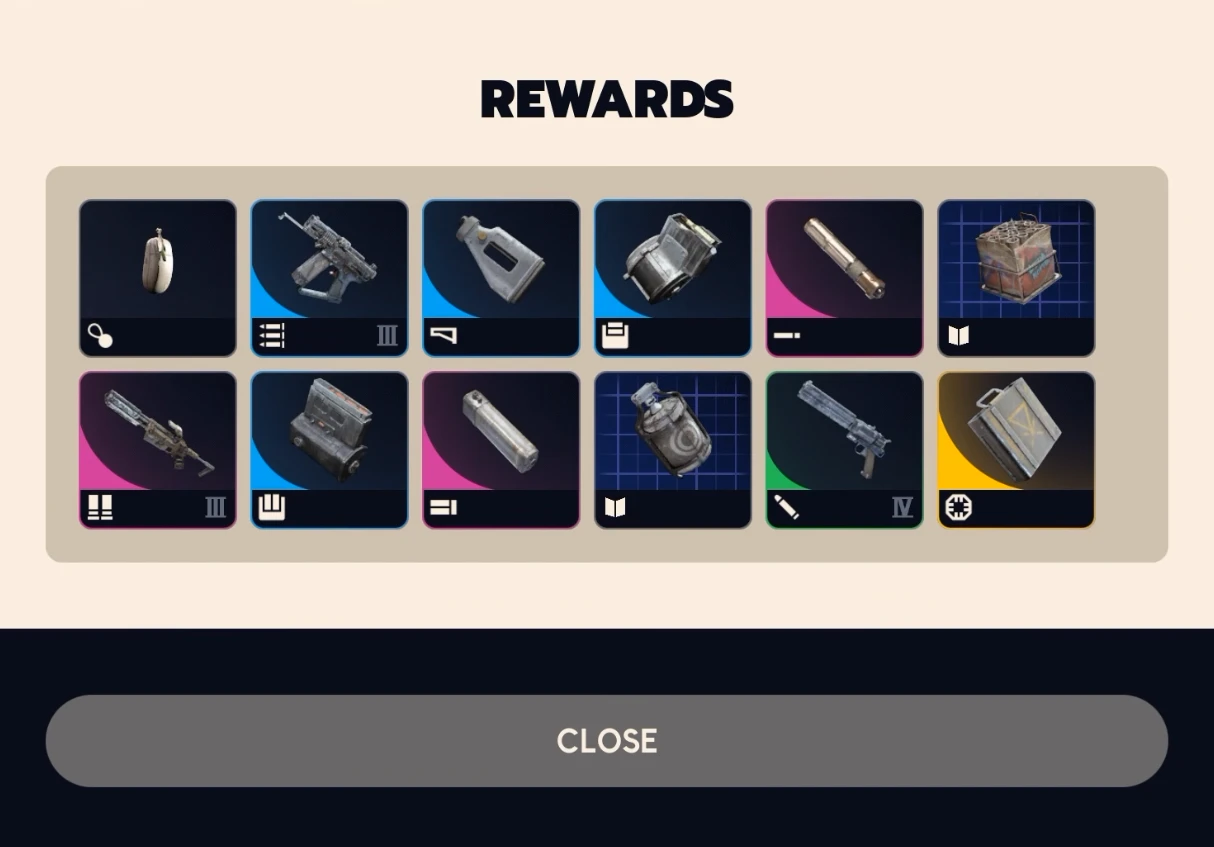
The Glitched ARC Parts: Merit Values
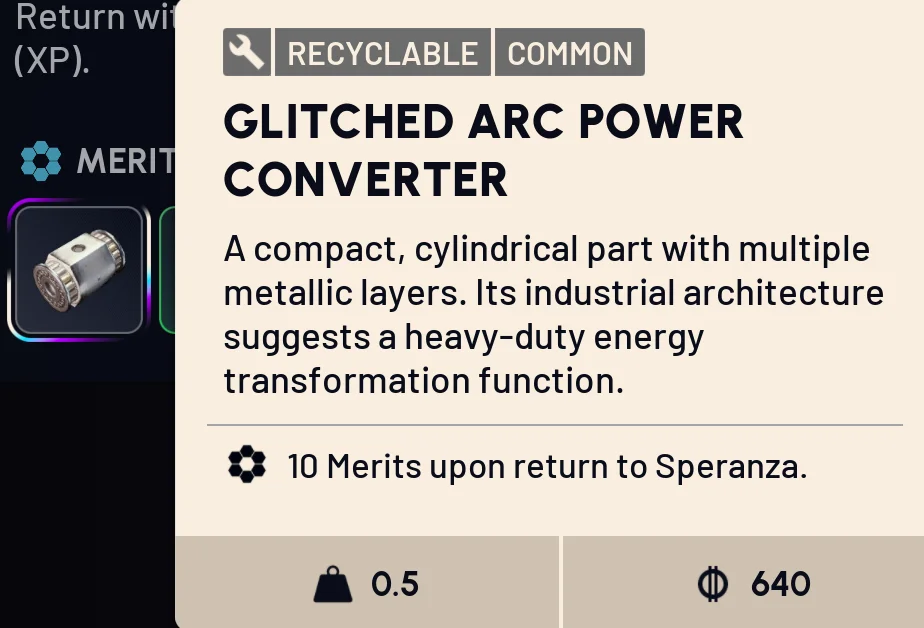
Every glitched part pulls double duty: it's a project resource and a Merit earner — each one grants Merits upon return to Speranza. All five weigh 0.5, and both the Merits and the sell value scale with rarity:
Glitched Part Values (Merits / Sell Value)
- Glitched ARC Power Converter (Common) — 10 Merits / 640
- Glitched ARC Transmitter (Uncommon) — 15 Merits / 1,000
- Glitched ARC Phased Array (Rare) — 25 Merits / 2,000
- Glitched ARC Light Ring (Epic) — 50 Merits / 3,000
- Glitched ARC Circuitry (Legendary) — 100 Merits / 5,000
Merit Rewards & the Anomalia Outfit
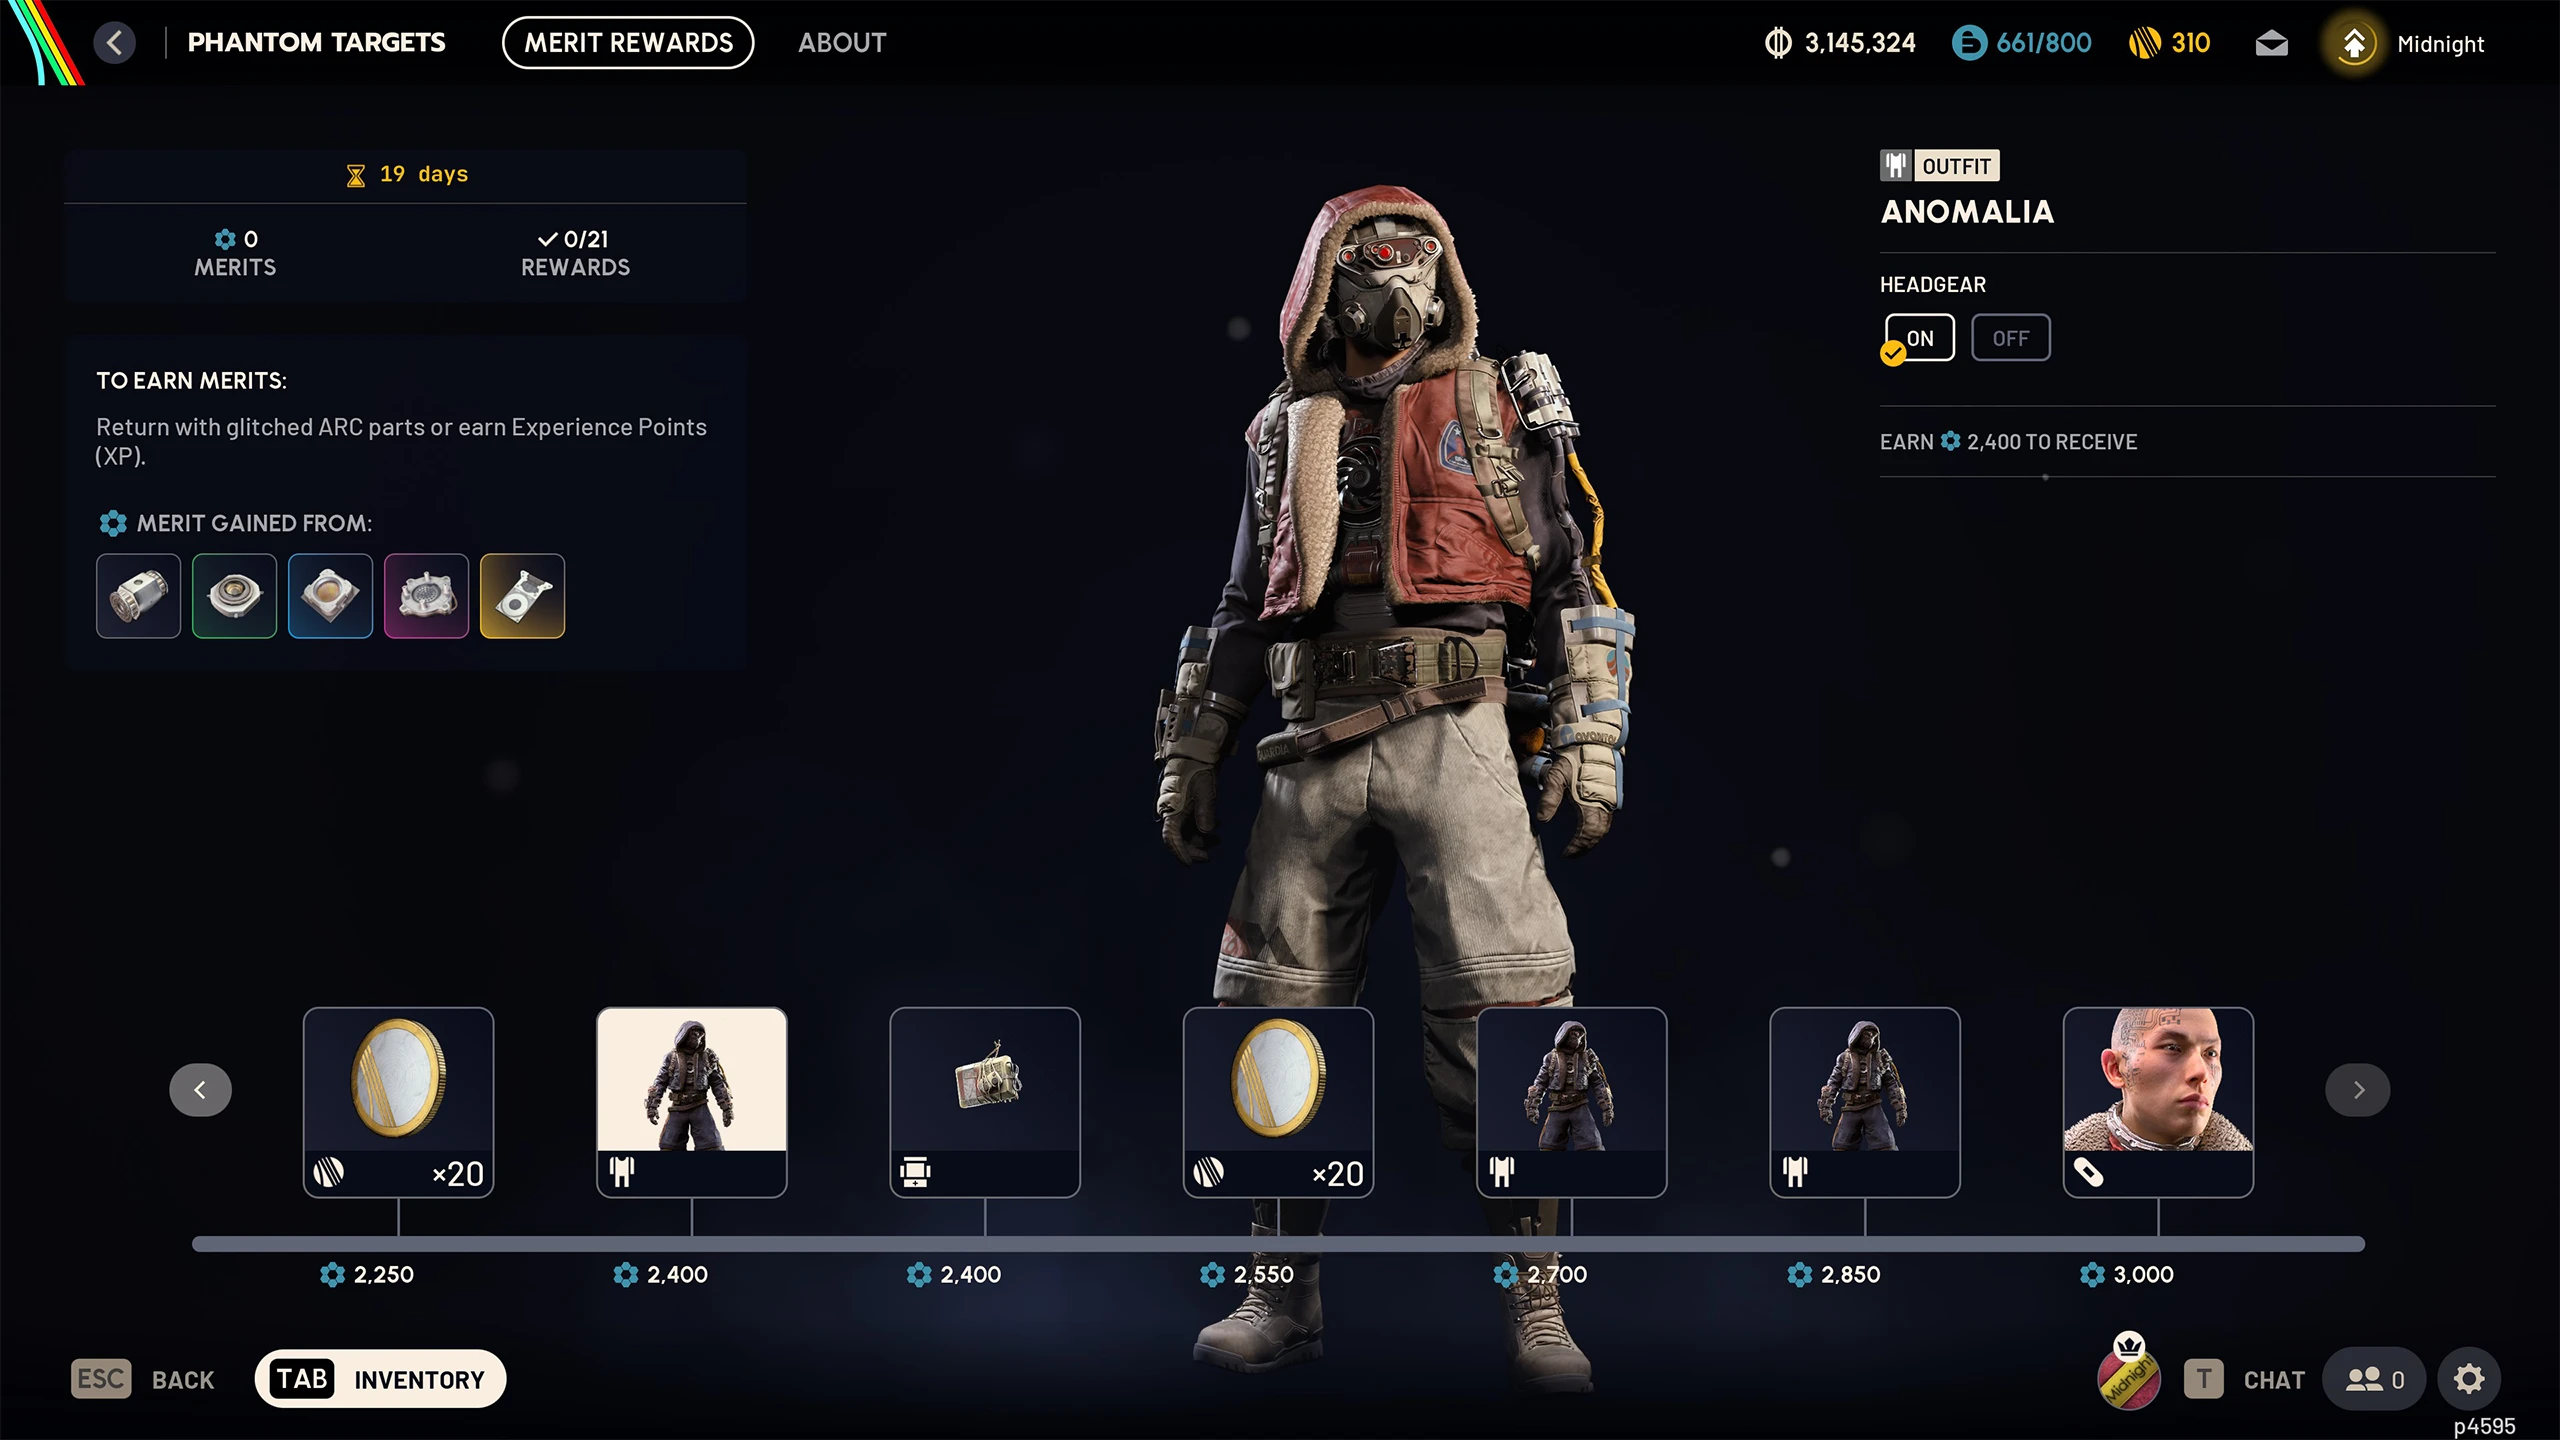
Alongside Part 2, the event adds a Merit rewards track with 21 rewards. You earn Merits two ways: return to Speranza with glitched ARC parts, or simply earn Experience Points — so every raid contributes even if the glitched Wasps elude you.
The headline reward is the Anomalia outfit at 2,400 Merits, with toggleable headgear. The track keeps going past it — more outfit pieces, charms, and cosmetics land at 2,550, 2,700, and 2,850, topping out with a face style at 3,000 Merits.
Don't rush to sell or recycle your glitched parts. Each part only counts for Merits when you extract with it, but after that it's still a project resource — and you need 10 of each rarity for stages 4 and 5. The efficient loop is: extract with everything glitched you find (banking the Merits), commit exactly what the stages need, and only then sell or recycle the surplus. And with the event running for 19 days from launch, there's no need to panic-grind — steady raids with XP ticking in will carry you a long way toward the Anomalia outfit on their own.
The Bigger Picture
Glitched ARC behaving strangely, right as Shani chases an unprecedented signal from beyond the mountains? Part 2 lands exactly where we predicted in our Frozen Trail announcement breakdown — this event reads like a direct narrative bridge into the October 8 Frozen Trail update. Keep an eye on the "About" tab in the project screen as the event progresses.